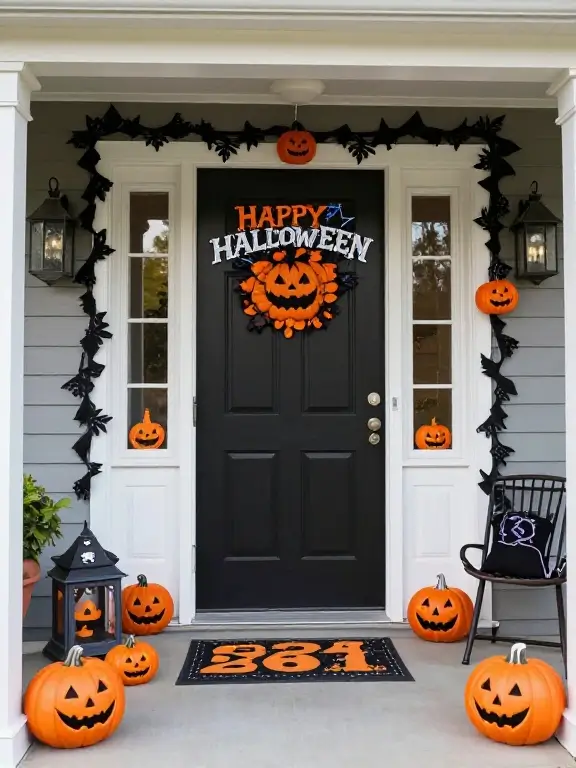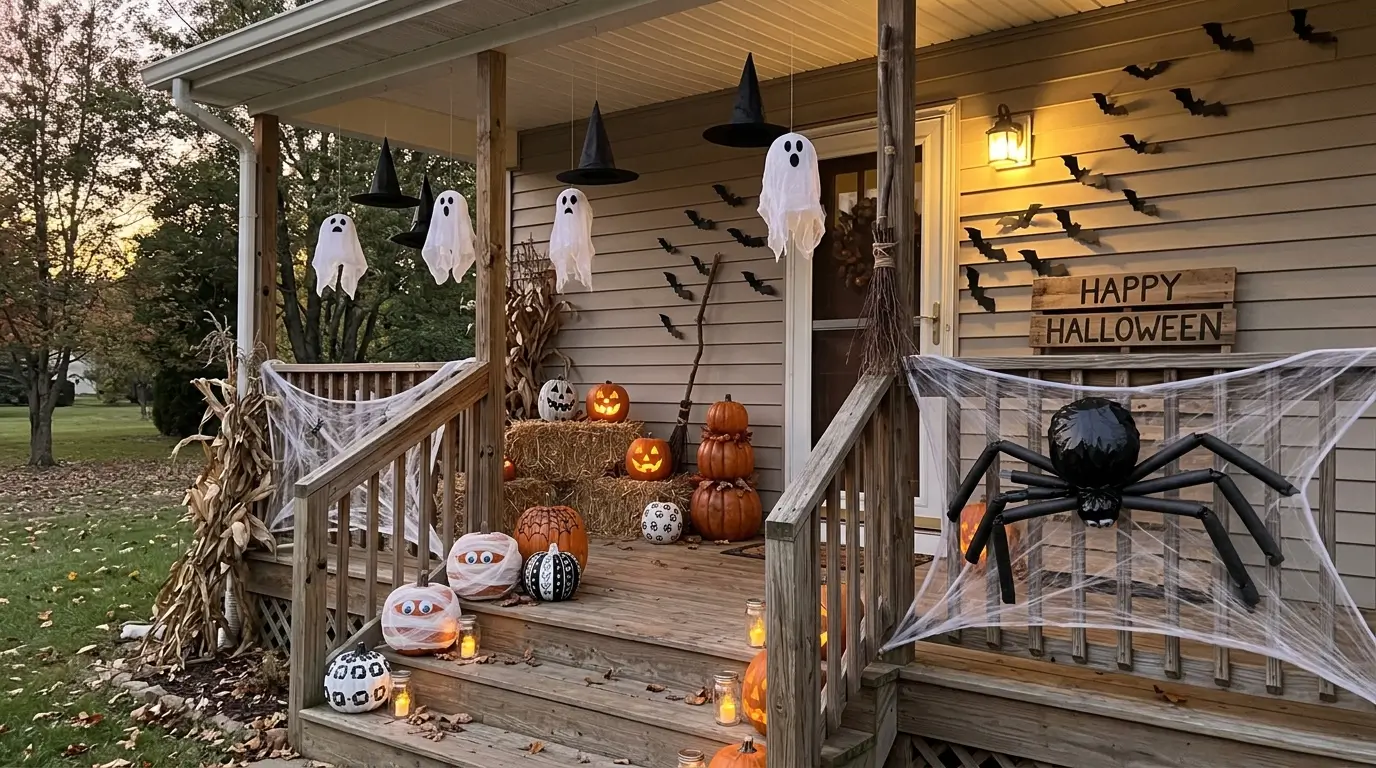
Want to give your home a spooky yet welcoming Halloween makeover? You don’t need expensive decorations or professional crafting skills to create a front porch that stands out.
With a few everyday supplies, recycled materials, and some creativity, you can turn your entrance into a festive Halloween display on a budget.
From glowing pumpkin lanterns and floating cheesecloth ghosts to creepy spiderwebs and miniature haunted houses, these DIY Halloween decorations for the front porch offer something for every decorating style.
Whether you love a classic haunted-house look, prefer cute decorations for children, or want an elegant autumn-inspired entrance, there is an idea you can easily adapt to your space.
The best part is that many of these projects use materials you may already have at home, such as cardboard boxes, glass jars, old fabric, twigs, and leftover craft supplies.
Ready to get creative? Here are 15 easy Halloween porch decorations, complete with materials, step-by-step instructions, and styling tips to help you create an eye-catching entrance.
15 Easy DIY Halloween Decorations for the Front Porch
1. Create a Spooky Pumpkin Display
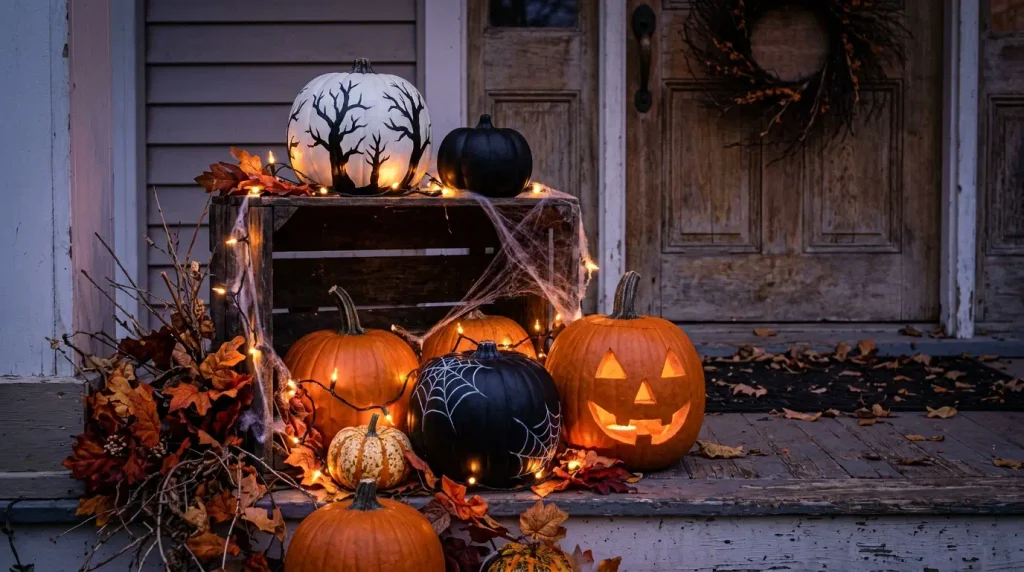
Pumpkins are timeless Halloween decorations that instantly make a front porch feel festive. Instead of simply placing one pumpkin beside your door, create a layered display using different sizes, colors, and textures.
What you need:
- Three to seven pumpkins in different sizes.
- Black, white, or orange acrylic paint.
- A wooden crate, basket, or small stool.
- Artificial autumn leaves.
- Battery-operated LED lights.
How to make it:
- Clean your pumpkins and allow them to dry.
- Paint a few pumpkins black, white, or metallic gold if you want a coordinated look.
- Place larger pumpkins at the bottom and smaller ones on crates or stools.
- Fill empty spaces with artificial autumn leaves.
- Add battery-operated lights to highlight the arrangement after sunset.
Styling tip: Combine traditional orange pumpkins with rustic wooden crates for a cozy farmhouse look. Alternatively, use black, cream, and white pumpkins for a more modern Halloween entrance.

2. Hang Floating Cheesecloth Ghosts
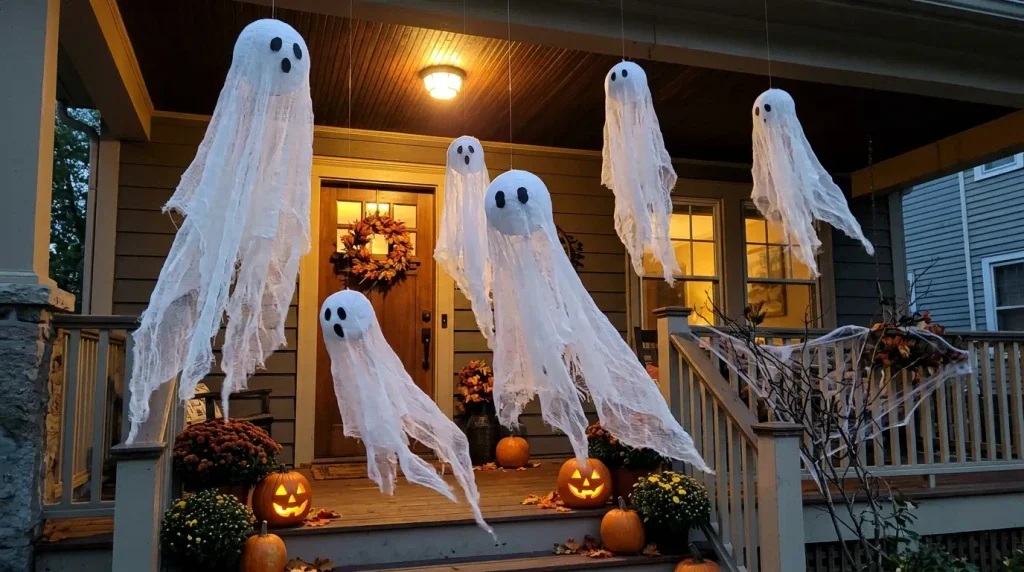
Floating ghosts are simple to make and add a playful haunted-house atmosphere to your entrance. Their lightweight appearance makes them particularly attractive when suspended at different heights beneath a covered porch.
What you need:
- White cheesecloth or lightweight white fabric.
- Small balloons or lightweight foam balls.
- Fishing line or strong string.
- Black paper or fabric for the eyes.
- Tape or suitable craft adhesive.
How to make it:
- Inflate a small balloon or use a foam ball to create the ghost’s head.
- Drape several layers of cheesecloth over the head, allowing the fabric to fall naturally.
- Attach black paper eyes using suitable adhesive.
- Secure the fabric around the head without completely flattening its shape.
- Attach fishing line to a secure support and hang the ghost.
- Repeat the process to create a small group of floating ghosts.
Styling tip: Hang three ghosts at different heights near the entrance to create the illusion that they are floating together. For a family-friendly display, use friendly faces instead of frightening expressions.
Keep the fabric away from candles, heaters, and electrical fixtures.
3. Decorate Your Front Door with a Halloween Wreath
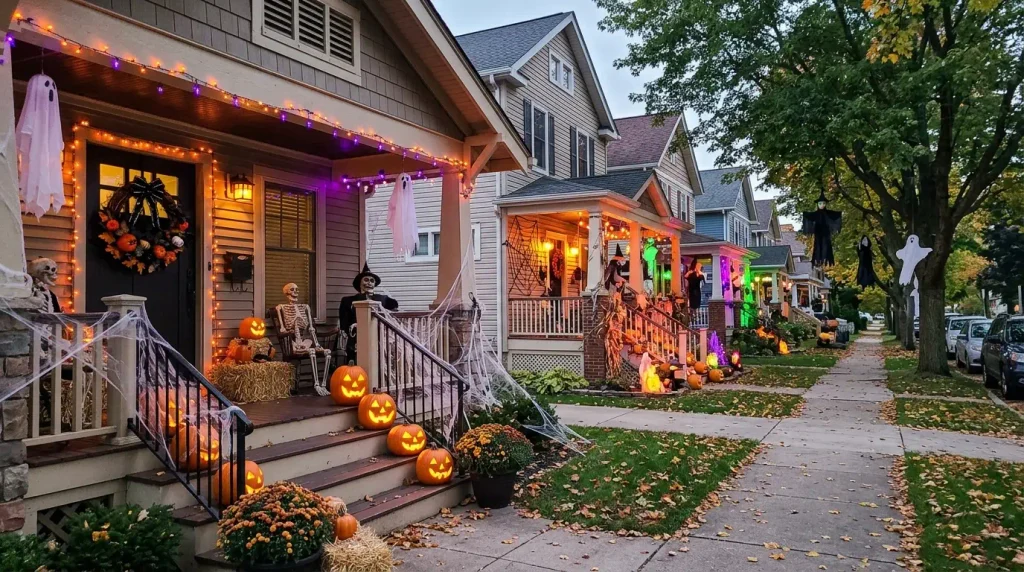
A Halloween wreath is an easy way to make your entrance look festive without filling every corner of your porch with decorations. It also works beautifully on smaller porches where floor space is limited.
What you need:
- A grapevine or foam wreath base.
- Black or orange ribbon.
- Artificial autumn leaves.
- Miniature pumpkins.
- Small decorative spiders, bats, or ghosts.
- Suitable craft adhesive.
How to make it:
- Start with a clean wreath base.
- Wrap it with black ribbon or leave the natural texture visible.
- Arrange artificial leaves and miniature pumpkins around the wreath.
- Add decorative bats, spiders, or small Halloween ornaments.
- Secure everything with suitable adhesive.
- Hang the finished wreath using a secure over-door hook.
Styling tip: For an elegant Halloween wreath, combine cream-colored pumpkins, black ribbon, and muted autumn foliage. For a more traditional appearance, use bright orange decorations and playful ghost ornaments.
4. Make a DIY Spiderweb Entrance
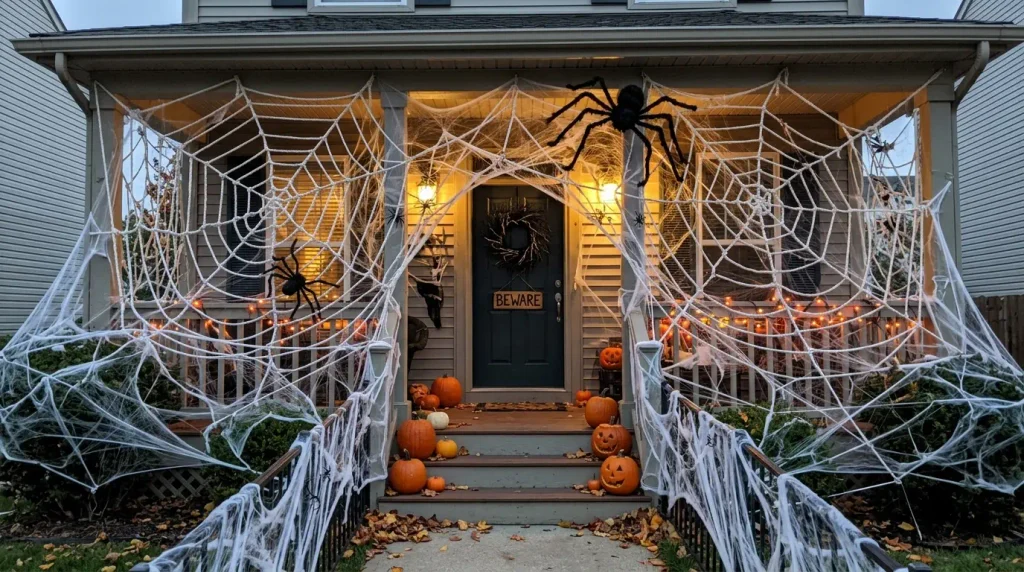
An oversized spiderweb can transform an ordinary porch corner into a spooky Halloween scene. Unlike small decorative webs, a handmade yarn web gives you more control over its size, shape, and placement.
What you need:
- White yarn or thick string.
- Plastic spiders.
- Removable outdoor hooks or suitable ties.
- Scissors.
How to make it:
- Choose a porch corner, railing, or suitable wall.
- Attach several lengths of yarn to create a star-shaped framework.
- Connect the main strands using shorter pieces of yarn.
- Continue working outward until you achieve the desired web pattern.
- Attach plastic spiders at different points.
- Add one larger spider as the main focal point.
Styling tip: Position the white web against a dark wall or door to create a stronger contrast. You can also combine it with hanging bats and a skeleton for a more dramatic haunted-house entrance.
Avoid placing the web across doorways or areas where visitors might walk into it.
5. Transform Old Glass Jars into Halloween Lanterns
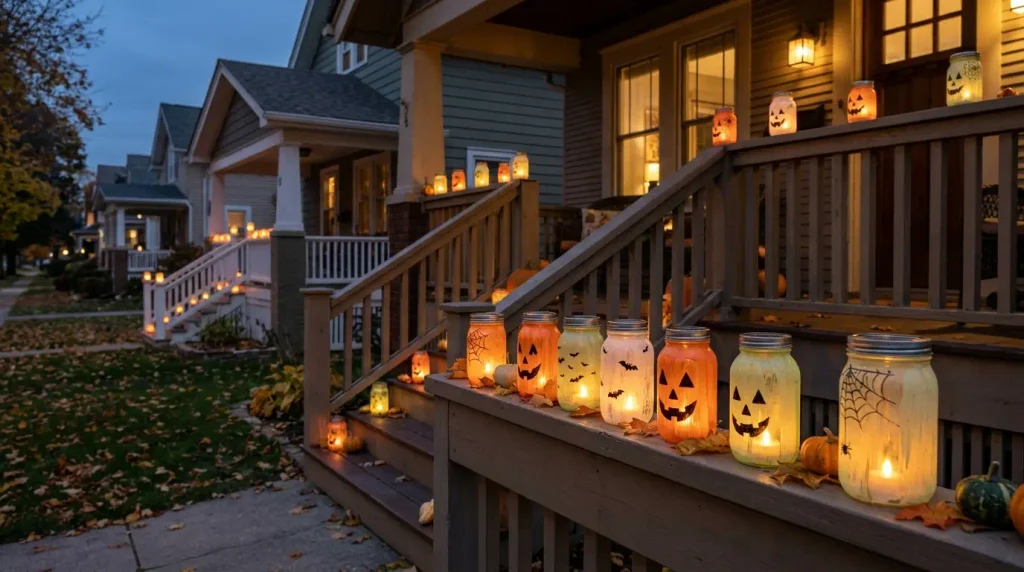
Before buying new Halloween lighting accessories, check your kitchen cupboards for empty glass jars. With a little paint and some battery-operated lights, you can transform them into attractive pumpkin lanterns, ghost jars, or spooky glowing decorations.
What you need:
- Clean, empty glass jars.
- Orange, white, or black glass-suitable paint.
- Paintbrushes.
- Black permanent markers or suitable paint.
- Battery-operated LED tea lights.
How to make it:
- Wash the jars thoroughly and remove their labels.
- Allow them to dry completely.
- Apply a suitable thin coat of paint to the outside of each jar.
- Once dry, draw pumpkin faces, ghost expressions, bats, or spiderweb patterns.
- Place an LED tea light inside each jar.
- Arrange the finished lanterns on a stable porch table or ledge.
Styling tip: Make three or five jars with different Halloween designs. Place them together near your pumpkin display to create a coordinated lighting arrangement.
Use battery-operated lights rather than open-flame candles, particularly around children, pets, and flammable decorations.
6. Create a Witch’s Broom Display
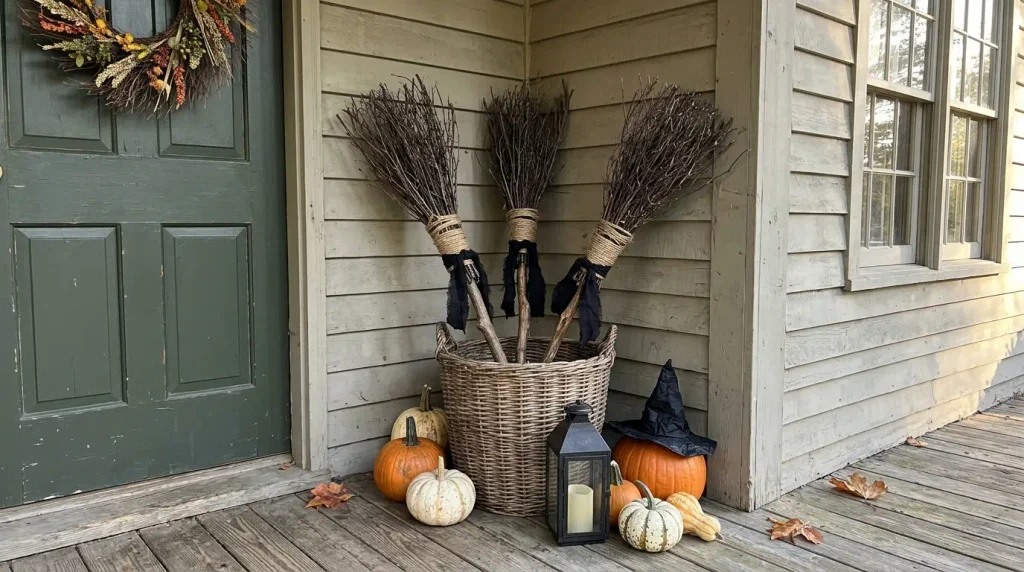
A handmade witch’s broom display adds a charming touch to rustic, farmhouse, and traditional Halloween decorations. It is also a practical project because you can use dry twigs and sturdy sticks collected from your garden.
What you need:
- Dry twigs or natural branches.
- Wooden dowels or sturdy straight sticks.
- Garden twine or natural string.
- Black decorative ribbon.
- A basket or suitable container.
How to make it:
- Gather dry twigs of similar lengths.
- Arrange them around one end of a sturdy wooden stick.
- Wrap twine tightly around the twigs to secure them.
- Trim uneven ends if necessary.
- Finish with a black ribbon tied around the handle.
- Place the broom upright in a sturdy basket beside your front door.
Styling tip: Make two or three brooms in different sizes and arrange them beside pumpkins or a witch-themed welcome sign. This creates a simple but recognizable Halloween scene.
Make sure the brooms are stable and cannot fall into the entrance or walkway.
7. Make a Creepy Halloween Welcome Sign
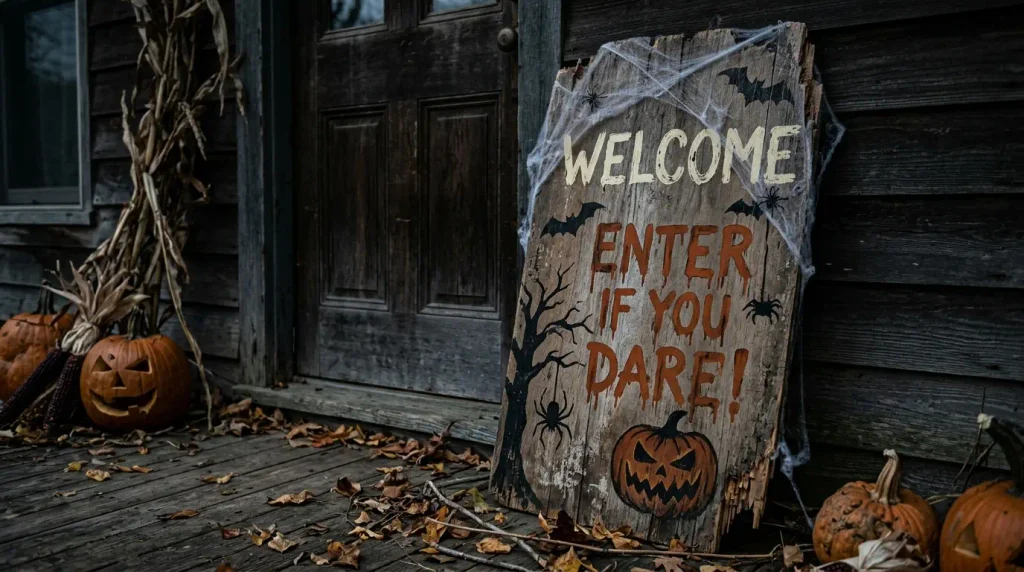
A handmade Halloween welcome sign is a simple way to introduce your decorating theme before visitors reach your front door. You can create one using an old wooden board, a spare picture frame, or sturdy cardboard.
What you need:
- A wooden board or sturdy sign base.
- Black, white, and orange paint.
- Paintbrushes.
- Letter stencils or templates.
- Artificial cobwebs or small decorative ornaments.
How to make it:
- Clean the board and apply your chosen background color.
- Write a short Halloween message such as “Enter If You Dare,” “Boo!” or “Happy Halloween.”
- Add small illustrations of pumpkins, bats, or ghosts.
- Allow the paint to dry completely.
- Place the sign on a stable stand or secure it to a suitable porch surface.
Styling tip: Use large, readable lettering and no more than two or three main colors. A simple design often looks more attractive than a sign crowded with too many decorations.
For a child-friendly porch, choose cheerful lettering and smiling pumpkin illustrations.
8. Turn Cardboard Boxes into Mini Haunted Houses
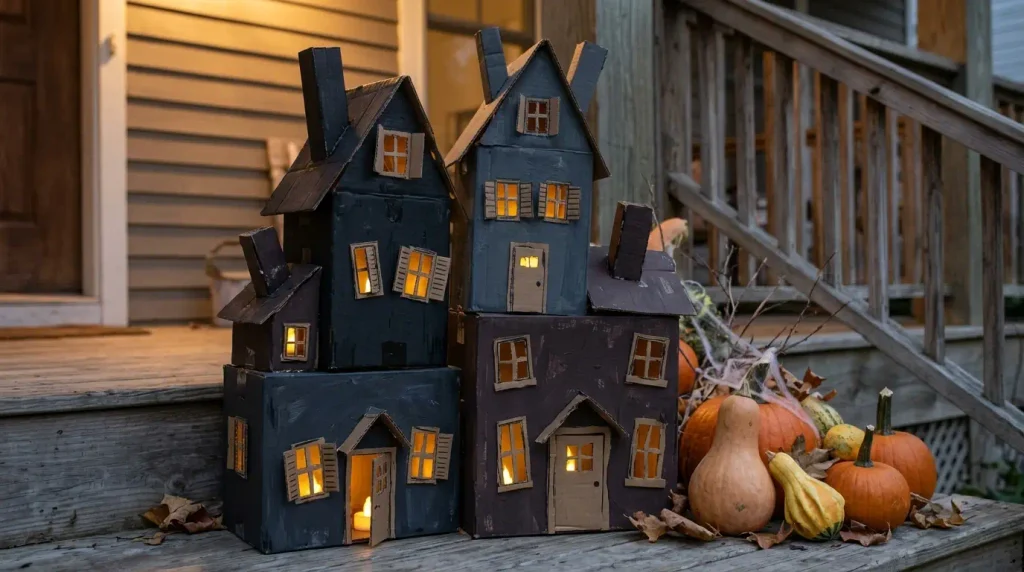
Instead of throwing away large cardboard boxes, turn them into miniature haunted houses. This inexpensive project is particularly enjoyable for families because children can help with painting and decorating.
What you need:
- Cardboard boxes in different sizes.
- Black, gray, and white paint.
- Scissors and a craft knife.
- Glue and masking tape.
- Black paper for windows.
- Battery-operated LED lights.
How to make it:
- Arrange the boxes to create the basic shape of a small haunted house.
- An adult should cut out the windows and doors.
- Paint the boxes black, gray, or dark brown.
- Add crooked windows, a spooky roofline, and other decorative details.
- Place battery-operated lights behind selected windows.
- Arrange the houses together to create a miniature haunted village.
Styling tip: Display two or three haunted houses at different heights beside your pumpkin arrangement. Add small artificial trees or paper bats to complete the scene.
Keep cardboard decorations under a covered porch, away from moisture and open flames. Remove them if they become wet or damaged.
9. Arrange a Skeleton-Themed Porch
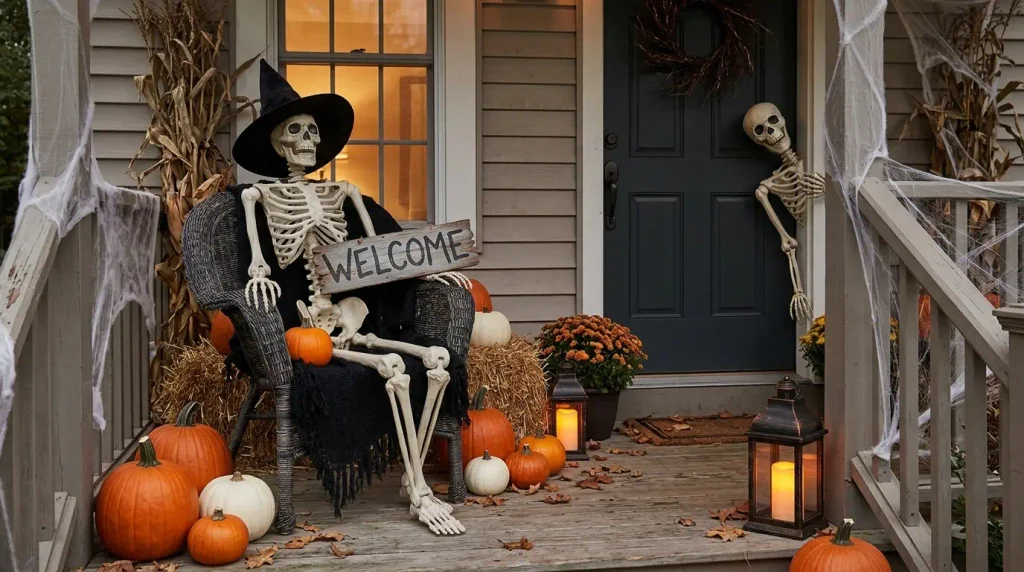
A decorative skeleton can become the centerpiece of your Halloween porch. Rather than simply placing it on the ground, arrange it in a funny or dramatic pose to create a display that catches visitors’ attention.
What you need:
- One or two decorative skeletons.
- A sturdy outdoor chair or bench.
- Black fabric or a small decorative blanket.
- A Halloween sign.
- Suitable ties or fasteners.
How to make it:
- Place the skeleton on a stable chair or bench.
- Adjust its arms and legs to create a sitting position.
- Add a small Halloween sign or pumpkin beside it.
- Use black fabric as a decorative accent.
- Secure the skeleton against movement caused by wind.
Styling tip: For a humorous display, arrange two skeletons as if they are having a conversation. For a more dramatic appearance, position one beside the doorway with a lantern nearby.
10. Decorate Porch Planters with Halloween Branches
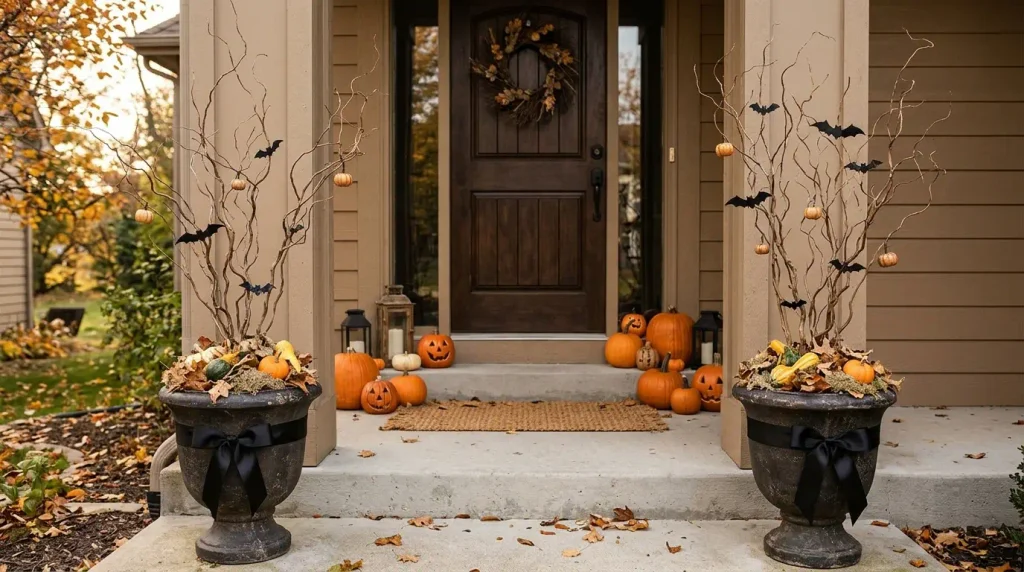
Your existing flowerpots can become attractive Halloween decorations with just a few seasonal additions. This idea is especially useful if you want to decorate your porch without purchasing large ornaments.
What you need:
- Existing flowerpots or sturdy planters.
- Dry branches.
- Black ribbon.
- Artificial bats or small hanging decorations.
- Decorative moss or autumn leaves.
How to make it:
- Select a stable planter that can support the branches.
- Insert several dry branches into the soil or a weighted base.
- Arrange the branches to create an interesting silhouette.
- Attach lightweight bats or miniature pumpkins.
- Tie black ribbon around the planter.
- Add decorative moss or autumn leaves around the base.
Styling tip: Place matching arrangements on either side of your entrance for a balanced appearance. You can also use different branch heights to create a more natural, slightly haunted look.
Secure the branches firmly and keep them away from visitors’ heads and walking paths.o the path where visitors could bump into them.
11. Craft Giant Hanging Bats
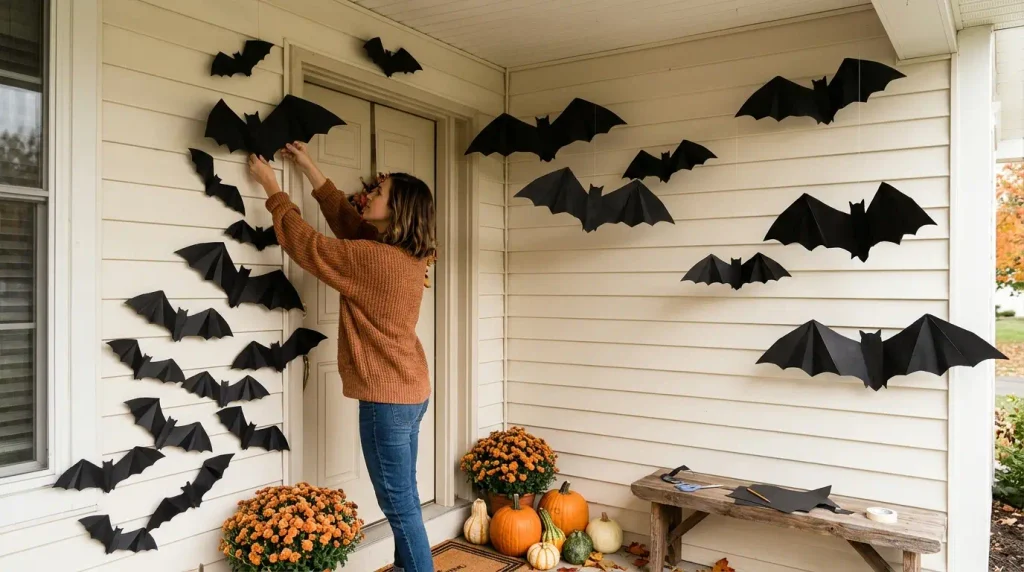
Black paper bats are simple to make and create a striking silhouette against a light-colored wall or front door. You can use a few large bats or create a cluster of smaller ones.
What you need:
- Black cardstock or lightweight craft foam
- Pencil and scissors
- Bat templates
- Removable adhesive or secure hanging line
How to make it:
- Draw or print bat shapes in different sizes.
- Trace the shapes onto black cardstock or craft foam.
- Cut out the bats carefully.
- Fold the wings slightly to give the shapes a three-dimensional appearance.
- Attach them to a suitable wall or door surface in a flying pattern.
Styling tip: Arrange the bats so they appear to fly upward from one corner of the doorway. This creates movement and draws the eye toward the entrance.
For outdoor displays, use weather-resistant materials and attachment methods appropriate for your wall or door finish.
12. Make a Spooky Front Porch Doormat
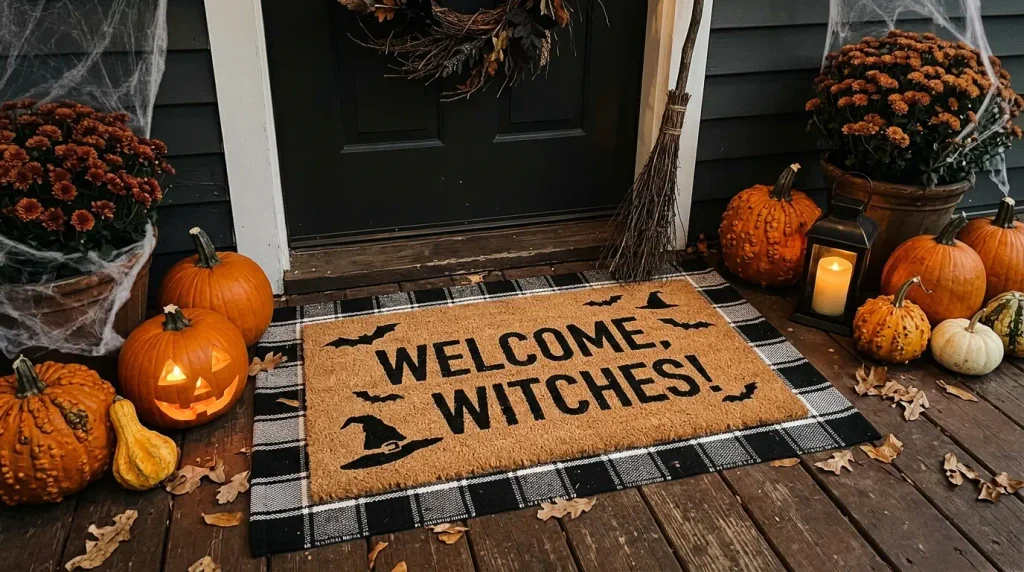
A Halloween doormat is a small decoration that can make a big difference. You can personalize a plain coir mat with a simple stencil and outdoor-appropriate paint.
What you need:
- A plain coir doormat
- A Halloween stencil
- Suitable outdoor paint
- Masking tape
- A protective covering for your work surface
How to make it:
- Choose a short message such as “Boo,” “Beware,” or “Welcome, Witches.”
- Position the stencil in the center of the mat.
- Secure it with masking tape.
- Apply paint with a stencil brush, using small amounts to prevent bleeding.
- Allow the mat to dry completely according to the paint instructions.
Styling tip: A black mat with white lettering creates a modern look, while an orange design adds a traditional Halloween touch.
Choose a mat that lies flat and does not slide. Keep the entrance clear and ensure the mat does not create a tripping hazard.
13. Create a Mummy-Wrapped Porch Column
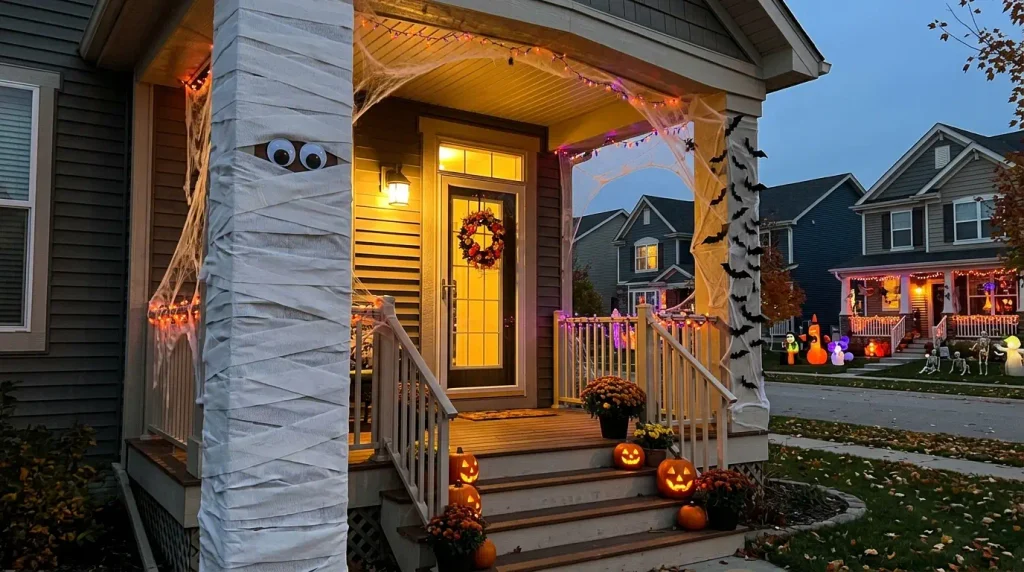
If your front porch has columns or posts, transform one into a giant mummy for an amusing Halloween display. This project requires only a few inexpensive supplies and can be completed in a short time.
What you need:
- White fabric strips or white crepe paper
- Large craft eyes
- Removable ties or suitable tape
- Scissors
How to make it:
- Begin wrapping the fabric around the column from the bottom upward.
- Overlap the strips to create a layered mummy appearance.
- Leave a small opening near the top for the eyes.
- Attach the craft eyes securely.
- Tuck in loose fabric ends and check that the wrapping is secure.
Styling tip: Wrap one column as a mummy and decorate the other with black bats or spiderwebs for a coordinated entrance.
Use materials suitable for outdoor conditions, and do not cover lights, electrical fixtures, handrails, or other essential safety features.
14. Design a Glowing Witch’s Cauldron
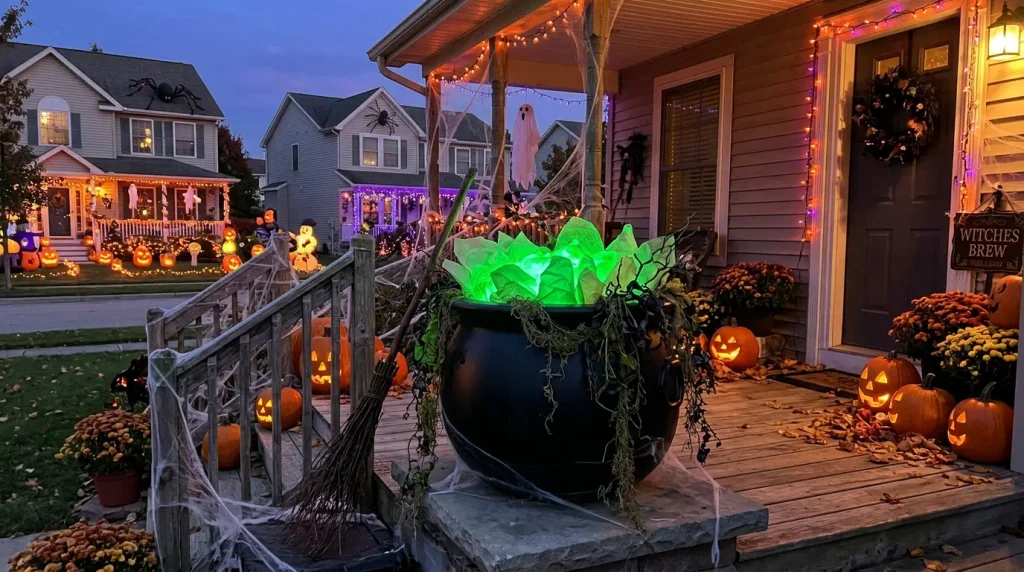
A glowing witch’s cauldron adds a dramatic focal point to a Halloween porch. It works particularly well alongside witch’s brooms, pumpkins, and dark-colored decorations.
What you need:
- A black plastic cauldron or sturdy dark container
- Green tissue paper or translucent fabric
- Battery-operated LED lights
- Optional artificial vines or decorative branches
- A stable base
How to make it:
- Place the cauldron on a stable, level surface.
- Arrange battery-operated lights inside the container.
- Add green tissue paper or translucent fabric to create a colorful glow.
- Place artificial vines or lightweight branches around the rim.
- Position the cauldron near your pumpkin display or welcome sign.
Styling tip: Combine green lighting with black decorations and a witch’s broom for a cohesive theme. Keep the design simple so the glowing cauldron remains the main attraction.
Do not use real fire or hot lighting materials. Keep electrical equipment protected from rain and follow the manufacturer’s outdoor-use instructions.
15. Build a Budget-Friendly Halloween Light Display
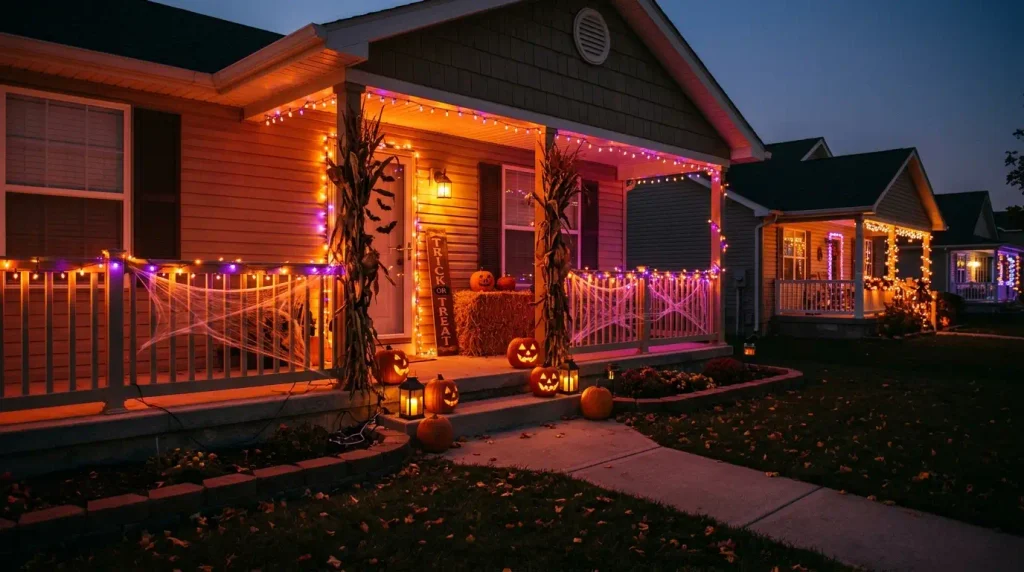
Lighting can transform even a simple Halloween porch into an eye-catching display after sunset. You do not need an elaborate lighting arrangement; a few carefully positioned lanterns and decorative lights can make a noticeable difference.
What you need:
- Battery-operated LED lanterns.
- Outdoor-rated string lights.
- Orange, purple, or warm-white LED lights.
- Suitable outdoor clips or fasteners.
- Existing pumpkins, signs, or other decorations.
How to make it:
- Choose one main lighting color to complement your decorations.
- Place LED lanterns near pumpkins, planters, or the front door.
- Hang outdoor-rated string lights along suitable porch edges.
- Highlight one or two main decorations with additional lighting.
- Test the arrangement after dark and adjust the positioning.
Styling tip: Warm orange lighting creates a cozy autumn atmosphere, while purple lighting gives the porch a more mysterious appearance. Soft white lighting is another good choice for a modern display.
Use lighting products specifically rated for their intended outdoor conditions. Keep cords away from walking areas, protect electrical connections as directed by the manufacturer, and avoid excessive brightness.
How to Style Halloween Decorations for a Beautiful Front Porch
Creating attractive Halloween decorations involves more than choosing spooky ornaments. Their arrangement, colors, lighting, and placement all contribute to the final appearance.
Here are four practical ways to make your display look coordinated and inviting.
1. Choose a Consistent Halloween Theme
Start by deciding what kind of Halloween atmosphere you want to create. A consistent theme helps prevent your porch from looking overcrowded.
| Halloween theme | Decorations and colors |
|---|---|
| Classic spooky | Orange pumpkins, black bats, skeletons, and spiderwebs. |
| Cute and family-friendly | Smiling ghosts, cheerful pumpkins, and colorful lanterns. |
| Modern and elegant | Black and white ornaments, cream pumpkins, and muted foliage. |
| Rustic autumn | Wooden signs, natural branches, baskets, and traditional pumpkins. |
| Haunted house | Dark fabrics, eerie lighting, skeletons, and dramatic silhouettes. |
Choose one main theme and select decorations that complement it.
2. Use Different Heights and Textures
A well-arranged porch usually looks more interesting when decorations are displayed at different heights.
For example:
- Place large pumpkins directly on the ground.
- Raise smaller pumpkins using wooden crates.
- Hang ghosts beneath a covered porch roof.
- Arrange lanterns on a stable table or ledge.
- Position tall branches in planters.
Combine materials such as wood, fabric, glass, paper, and foliage to introduce texture without making the display feel cluttered.
3. Use Lighting to Highlight Your Decorations
Lighting helps your favorite decorations remain visible after sunset.
Consider using:
- LED lanterns beside pumpkin displays.
- Outdoor-rated string lights along porch edges.
- Small LED lights inside decorative jars.
- Battery-operated lights inside a witch’s cauldron.
- Soft accent lighting around a welcome sign.
Position lights carefully so visitors can see steps, ramps, and changes in floor level.
4. Adapt Your Decorations to Your Porch Size
You do not need a large entrance to create an attractive Halloween display. The important thing is to use your available space effectively.
| Porch type | Decorating approach |
|---|---|
| Small front porch | Use a wreath, a compact pumpkin arrangement, and hanging bats. |
| Large front porch | Combine a skeleton, multiple pumpkins, planters, and a lighting display. |
| Covered porch | Add hanging ghosts, fabric decorations, and sheltered cardboard crafts. |
| Open porch | Prioritize weather-resistant decorations and secure lightweight ornaments. |
| Rental property | Use over-door hooks, removable attachments, freestanding signs, and movable decorations. |
For small entrances, prioritize vertical decorations rather than filling the floor with ornaments.
How to Make DIY Halloween Decorations on a Budget
Creating a beautiful Halloween entrance does not require a large decorating budget. A little planning and resourcefulness can help you make attractive decorations while avoiding unnecessary purchases.
1. Reuse Household Materials
Look around your home before purchasing new supplies. Empty glass jars, cardboard boxes, old fabric, wooden boards, baskets, and leftover paint can all become useful Halloween decorations.
For example, an old bedsheet can become a hanging ghost, while cardboard boxes can be transformed into miniature haunted houses.
2. Focus on One or Two Statement Pieces
Instead of buying many small decorations, choose one or two focal points.
A pumpkin arrangement, decorative skeleton, or glowing cauldron can become the centerpiece of your porch. Surround it with inexpensive handmade ornaments to complete the display.
3. Refresh Decorations from Previous Years
Check your storage boxes for artificial pumpkins, wreath bases, ribbons, lanterns, and string lights.
You can refresh older decorations with new paint, different ribbons, or a few inexpensive Halloween accessories.
4. Choose Decorations You Can Reuse
If you plan to decorate every Halloween, consider making durable decorations that can be stored and reused.
Artificial pumpkins, plastic cauldrons, sturdy wreath bases, and wooden signs are useful options. Store fabric and paper decorations in dry containers to protect them from moisture and damage.
5. Plan Your Display Before You Begin
Arrange your decorations before attaching or displaying them. Decide where your main focal point will be, which areas need lighting, and how much room visitors need.
Planning helps you identify missing materials and avoid purchasing items that do not fit your chosen theme.
Halloween Front Porch Safety Tips
A beautiful Halloween entrance should also be safe for household members, visitors, and trick-or-treaters.
Keep these precautions in mind when preparing your display:
- Keep exits and walkways clear: Leave enough room for people to approach and open the front door safely.
- Avoid open flames: Use battery-operated candles or LED lights instead of real candles around fabric, cardboard, paper, and dried foliage.
- Secure lightweight decorations: Fasten hanging ghosts, bats, signs, and branches so they do not fall during windy conditions.
- Use appropriate outdoor lighting: Check product labels and follow the manufacturer’s instructions for outdoor use.
- Manage electrical cords: Keep cords away from walking paths and protect connections from moisture as directed by the manufacturer.
- Avoid unstable arrangements: Make sure pumpkins, planters, signs, and skeleton displays cannot easily topple over.
- Protect children and pets: Avoid sharp objects, small detachable decorations, and materials that could be pulled down or swallowed.
- Check decorations regularly: Remove damaged, wet, or unstable items, especially after heavy rain or strong winds.
The National Fire Protection Association recommends keeping decorations away from heat sources and keeping exits clear. It also recommends battery-operated candles or glow sticks for jack-o’-lanterns.
See its Halloween Fire Safety Guidance for additional precautions.
For electrical decorations, the U.S. Consumer Product Safety Commission also provides information about seasonal and decorative lighting safety
Halloween Front Porch Decorating Checklist
Use this checklist to organize your decorating project and avoid unnecessary purchases.
- Choose a Halloween theme and color palette.
- Set a decorating budget.
- Check which supplies you already have.
- Select one or two statement decorations.
- Prepare your DIY Halloween projects.
- Add a wreath, welcome sign, or seasonal doormat.
- Arrange decorations at different heights.
- Install suitable outdoor lighting.
- Secure decorations against wind.
- Keep stairs, handrails, and walkways clear.
- Test the lighting after dark.
- Check the display for fire, electrical, and tripping hazards.
Frequently Asked Questions About Halloween Decorations
1. What Are the Easiest DIY Halloween Decorations for a Front Porch?
The easiest DIY Halloween decorations include pumpkin displays, paper bats, hanging ghosts, decorated glass jars, and handmade welcome signs. Most require only a few affordable supplies and can be completed without advanced crafting skills.
2. How Can I Decorate My Front Porch for Halloween on a Budget?
Reuse household materials such as cardboard boxes, glass jars, old fabric, and wooden boards. Add a few pumpkins and battery-operated lights to create a festive display without spending much money.
3. How Do I Make My Halloween Porch Look Spooky at Night?
Use suitable LED lanterns, orange or purple outdoor lights, hanging ghosts, dark silhouettes, and glowing pumpkin displays. Position lights to highlight decorations while keeping stairs and walkways clearly visible.
4. What Are Some Family-Friendly Halloween Decoration Ideas?
Smiling pumpkin displays, friendly ghosts, colorful lanterns, handmade Halloween signs, and miniature haunted houses are excellent family-friendly options. Children can help with painting, arranging decorations, and drawing faces when adults supervise age-appropriate activities.
5. How Can I Protect DIY Halloween Decorations from Rain and Wind?
Use weather-resistant materials where possible, secure lightweight decorations with suitable fasteners, and place delicate paper or cardboard crafts in covered areas. Bring vulnerable decorations indoors during heavy rain or strong winds.
6. When Should I Put Up Halloween Decorations?
Many homeowners begin decorating in late September or early October. However, you can start whenever it suits your schedule, especially if you are making decorations by hand or gradually building a larger display.
7. How Can I Make My Halloween Decorations Look More Expensive?
Choose a consistent color palette, use decorations of different heights, add warm lighting, and focus on a few statement pieces. Coordinated pumpkins, a handmade wreath, attractive planters, and a simple welcome sign can create a polished appearance without a large budget.
Conclusion
Creating an attractive Halloween entrance does not have to be expensive or complicated. With these 15 easy DIY Halloween decorations for the front porch, you can turn an ordinary doorway into a festive space using affordable materials, simple crafts, and a little imagination.
Whether you prefer floating ghosts, handmade wreaths, glowing lanterns, pumpkin displays, or a spooky skeleton arrangement, the key is to choose decorations that complement your home and available space.
Start with one or two statement pieces, add a few handmade accents, and finish with suitable lighting. Remember to secure your decorations and keep the entrance clear so your porch remains welcoming and safe.
Which of these DIY Halloween decorations would you love to try first? Choose your favorite idea, gather your supplies, and start creating a Halloween entrance your family and trick-or-treaters will enjoy. Save this guide for your next decorating project and share it with someone who loves creative Halloween ideas!