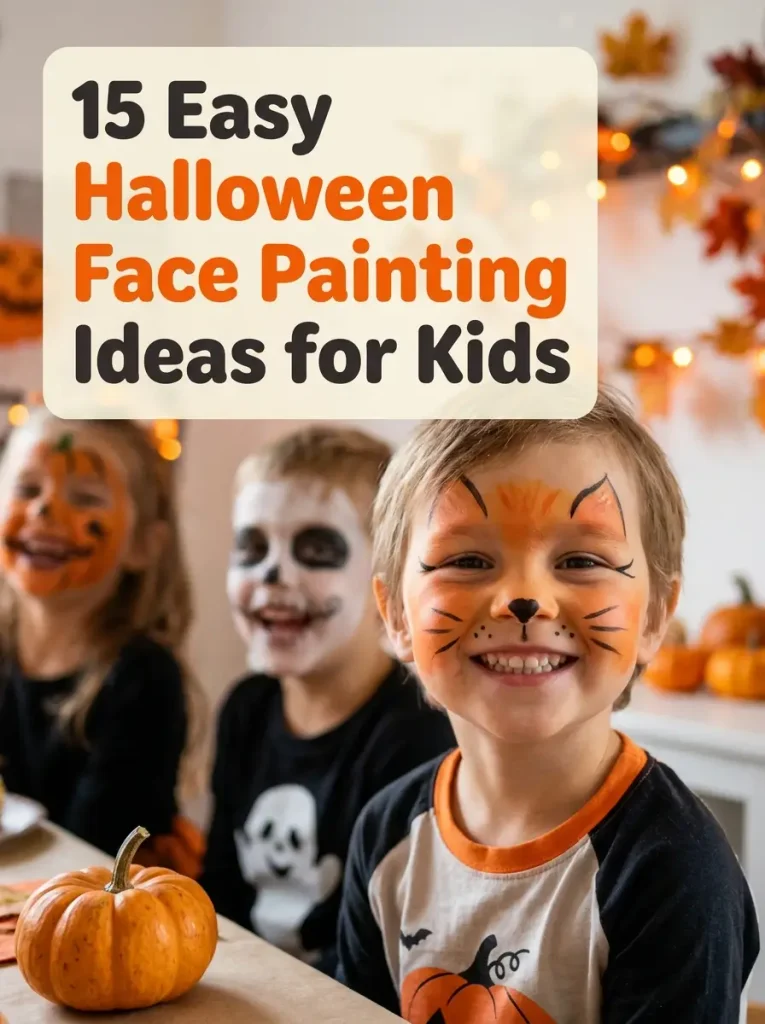
Looking for easy Halloween face painting ideas for kids that are cute, creative, and simple to recreate at home? You do not need professional makeup skills or an expensive collection of supplies to give your child a fun Halloween look.
With a few skin-safe face paints, a small brush, and a little patience, you can create everything from a friendly pumpkin to a playful black cat.
These 15 Halloween face paint designs include quick options for busy parents, cute animal faces for younger children, and slightly spookier looks for kids who enjoy Halloween thrills. Each idea includes the colors you need, simple application steps, and tips to make the finished design look its best.
1. Cute Black Cat Face Paint
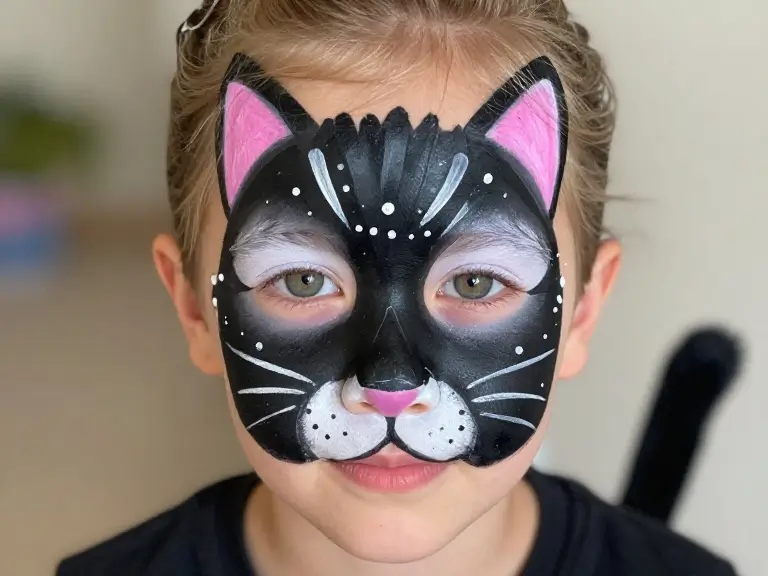
A black cat is one of the most recognizable Halloween looks and works well for children who love animals. The design can be as simple as a painted nose and whiskers or more detailed with little ears and decorative lines.
What you need: Black, white, and optional pink face paint.
How to create the look:
- Paint a small black triangle on the tip of the nose.
- Draw a thin line from the nose toward the upper lip.
- Add three fine whiskers to each cheek.
- Use small white dots around the whiskers for extra detail.
- If your child wants a more dramatic look, add simple cat markings on the forehead.
Make it special: Pair the face paint with cat ears, a black shirt, and a tail. You can skip the larger painted areas if your child prefers a lighter design.
Recommended product: Black-and-white cosmetic face paint.

2. Happy Pumpkin Face Paint
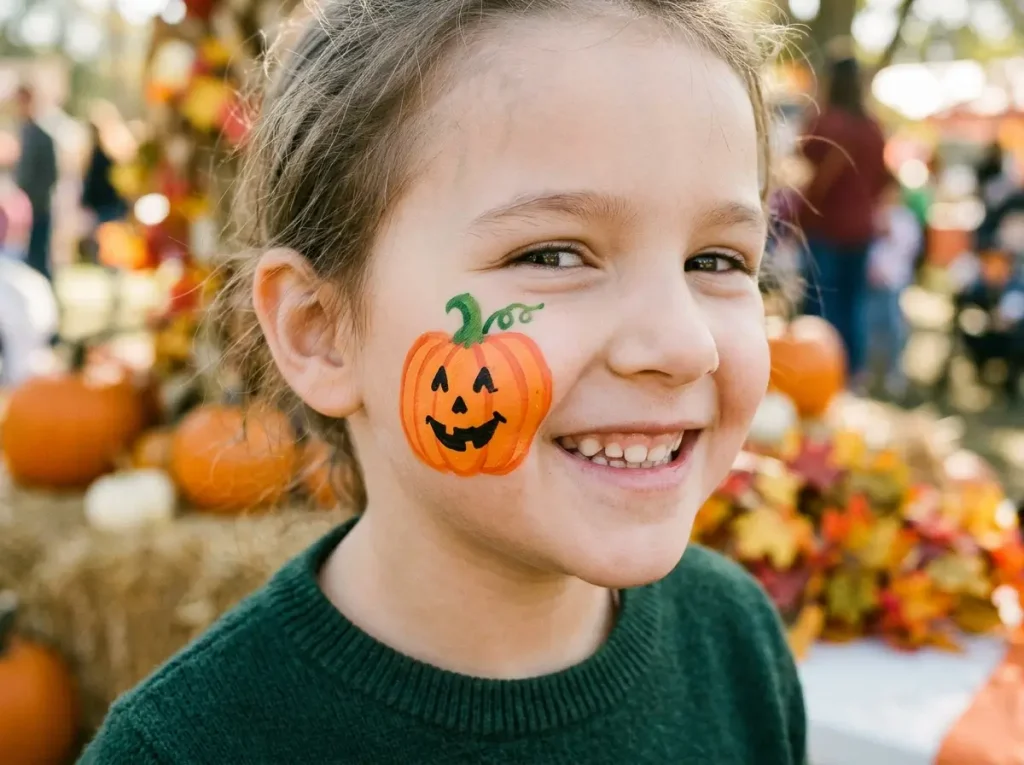
Pumpkin face paint brings classic Halloween colors to life. Its bright orange base and simple green details make it a cheerful option for pumpkin-themed costumes and school celebrations.
What you need: Orange, green, and black face paint.
How to create the look:
- Paint a small orange pumpkin shape on one cheek or the forehead.
- Add a short green stem at the top.
- Use black paint to create a smiling mouth, two eyes, or a tiny triangular nose.
- Add curved lines to suggest the pumpkin’s natural sections.
- Finish with a few small green leaves if desired.
Beginner tip: Instead of covering the whole face in orange, start with one pumpkin on the cheek. It takes less time and is easier to correct.
Recommended product: Orange, green, and black cosmetic face paints.
3. Friendly Ghost Face Paint
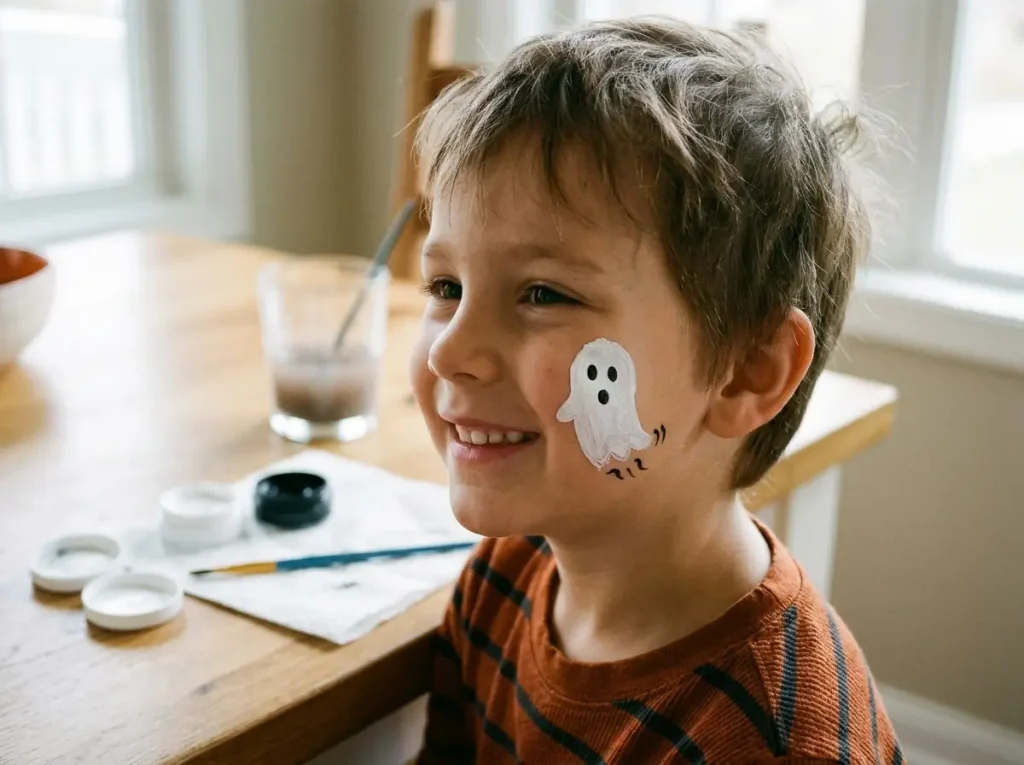
Difficulty: Easy | Time: 5–8 minutes
Ghost face paint is ideal for children who want something spooky without looking too frightening. A small white ghost with dark eyes is easy to recognize and does not require complicated shading.
What you need: White and black face paint.
How to create the look:
- Paint a small white ghost outline on one cheek.
- Fill the shape with white face paint.
- Add two black oval eyes.
- Draw a small oval mouth to create a surprised expression.
- Add a few tiny black lines underneath to suggest a floating ghost.
Make it cute: Give the ghost round eyes and a smiling mouth instead of sharp teeth or an angry expression.
Recommended product: White and black face paint.
4. Little Bat Face Paint
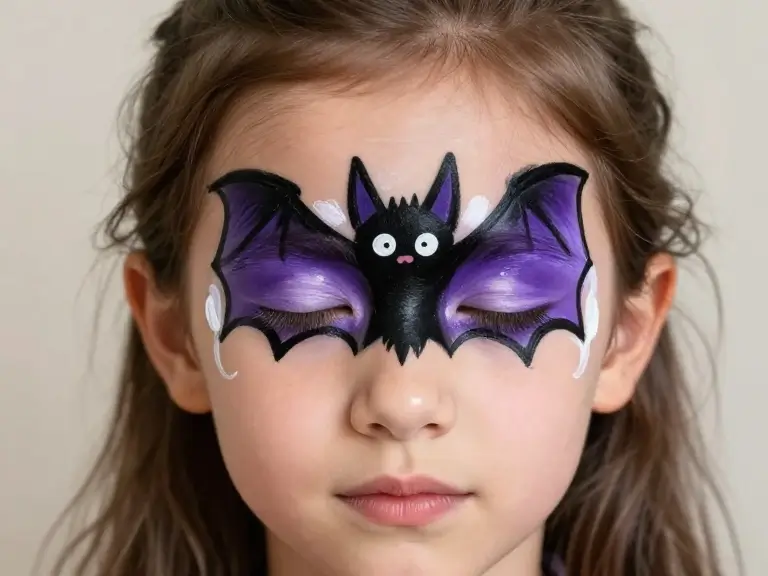
Difficulty: Easy to moderate | Time: 8–12 minutes
A bat design is a good choice for children who want a classic spooky character without a full-face costume makeup look. The wings can stretch across the forehead or sit on one cheek.
What you need: Black, purple, and optional white face paint.
How to create the look:
- Draw a small bat body in the center of the forehead or on one cheek.
- Paint two wide wings extending outward.
- Add gentle points along the lower edges of the wings.
- Use white paint to add tiny eyes or small highlights.
- Add a few purple details to make the design more colorful.
Beginner tip: Sketch the bat shape lightly with a damp brush before filling it in. Keep the wings simple rather than trying to create detailed anatomy.
Recommended product: Black and purple cosmetic face paint.
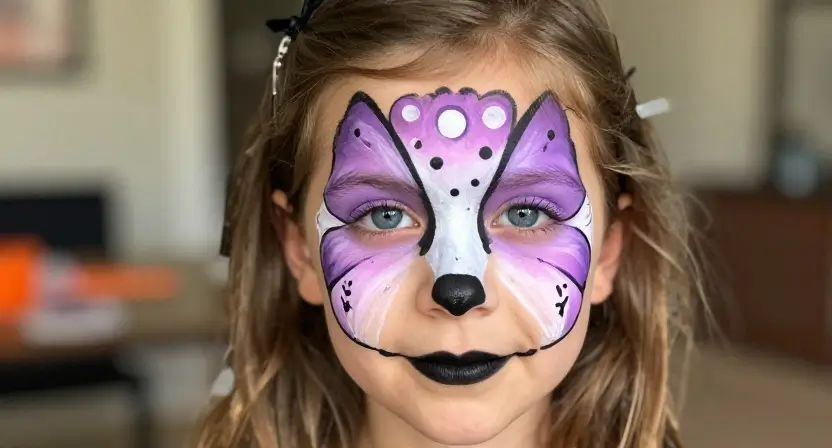
5. Butterfly Fairy Face Paint
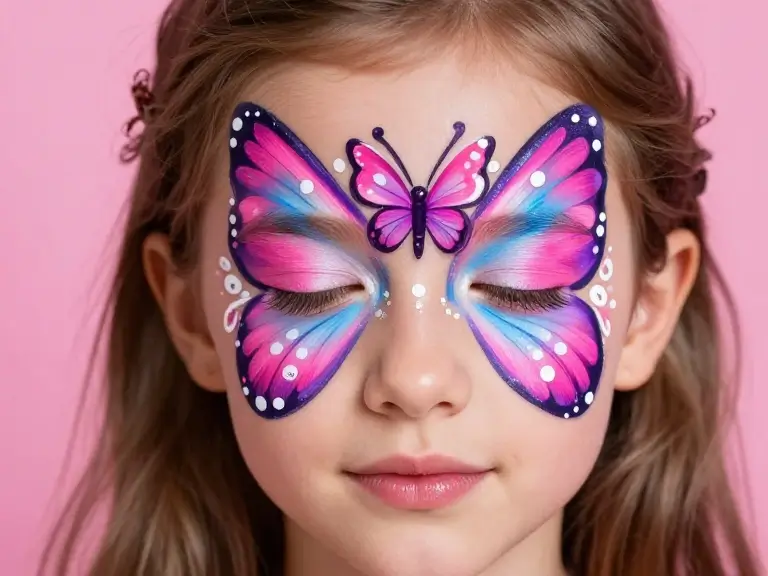
Difficulty: Easy to moderate | Time: 10–15 minutes
For children who prefer colorful costumes to spooky monsters, butterfly face paint is a lovely Halloween alternative. Bright wings, small dots, and a few decorative curls create a playful fairy-inspired look.
What you need: Pink, purple, blue, white, and optional cosmetic glitter specifically labeled for facial use.
How to create the look:
- Paint two wing shapes around the outer corners of the eyes, staying outside the eye area.
- Fill the wings with pink, purple, or blue.
- Outline the shapes with a thin contrasting line if desired.
- Add white dots and small curls along the outer edges.
- Place a small butterfly body on the forehead or between the brows, avoiding the eyes.
Make it magical: Match the colors to your child’s fairy wings, dress, or costume accessories.
Recommended product: A cosmetic face paint palette with bright colors.
6. Spiderweb Face Paint
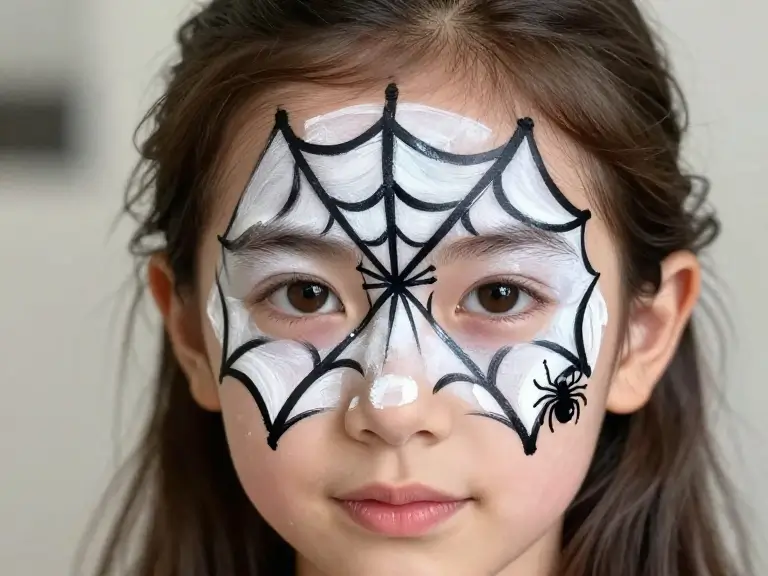
Difficulty: Easy | Time: 5–10 minutes
Spiderweb face paint is a useful last-minute idea because it relies mostly on thin lines. It can be drawn on the forehead or along one outer cheek for a simple, recognizable Halloween design.
What you need: Black and white face paint.
How to create the look:
- Draw three or four thin lines radiating from a point on the forehead or cheek.
- Connect the lines with small curved strokes.
- Keep the spaces between the curved lines consistent.
- Add a tiny spider beside the web if your child likes extra detail.
- Use a white dot or short line to highlight the spider.
Beginner tip: Use a fine brush and avoid pressing too hard. A small, neat web often looks better than a large, crowded one.
Recommended product: A fine face painting brush.
7. Tiny Skeleton Face Paint
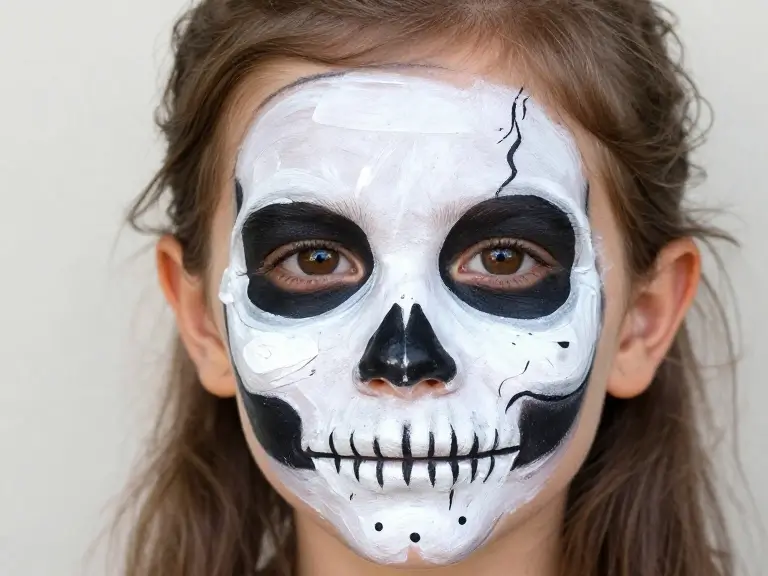
Difficulty: Moderate | Time: 10–15 minutes
Skeleton face paint is a classic choice for children who enjoy a slightly spooky look. A small skull design is often easier to apply than a full white-and-black skeleton face.
What you need: White and black cosmetic face paint.
How to create the look:
- Apply a small white patch to one cheek.
- Add two black eye sockets within the painted shape.
- Draw a short dark line for the nose.
- Use thin vertical lines to suggest teeth along the lower edge.
- Add a few small black marks to give the skull a cartoon-like expression.
Make it kid-friendly: Keep the skull smiling or surprised rather than adding realistic cracks, deep shadows, or frightening details.
Recommended product: White and black face paint with a fine brush.
8. Frankenstein Monster Face Paint
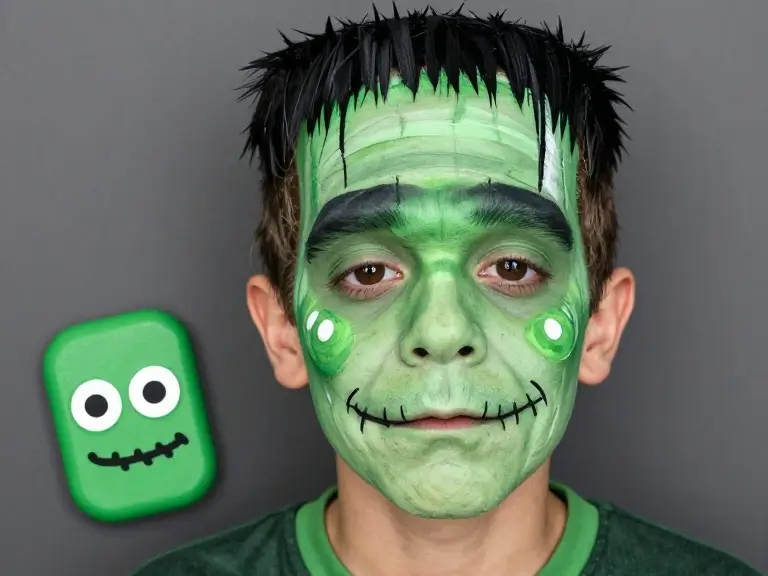
Difficulty: Easy to moderate | Time: 8–12 minutes
A Frankenstein-inspired design works well with a green face or a smaller green monster painted on the cheek. The second option is quicker and uses less paint.
What you need: Green, black, and white face paint.
How to create the look:
- Paint a small green rectangular or rounded monster face on one cheek.
- Add thick black eyebrows and two dark eyes.
- Draw a wide smiling mouth.
- Add short black lines to resemble stitches.
- Paint two small white highlights in the eyes if space allows.
Costume pairing: A green shirt, dark trousers, and a simple monster-themed accessory complete the look.
Recommended product: Green and black face paint.
9. Tiger Cub Face Paint
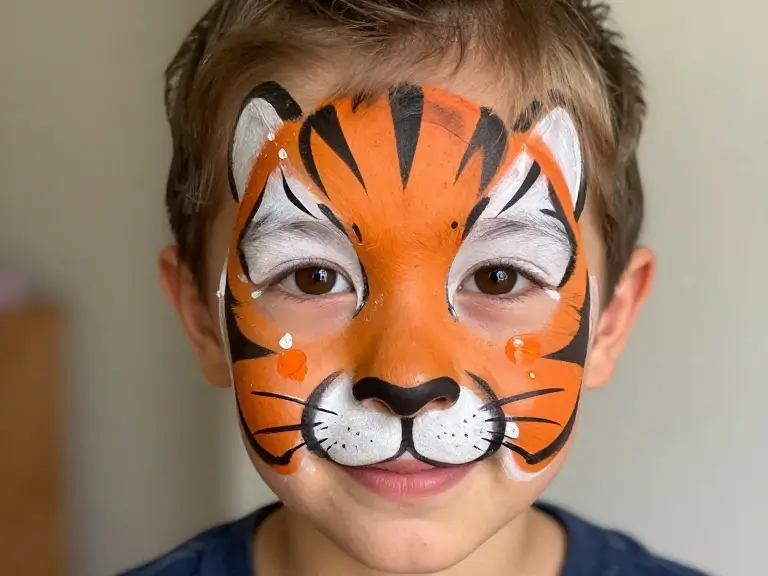
Difficulty: Moderate | Time: 10–15 minutes
Tiger face paint is perfect for children who enjoy animal costumes. Orange cheeks, a dark nose, and a few stripes create the look without requiring a complicated full-face transformation.
What you need: Orange, black, and white face paint.
How to create the look:
- Paint small orange patches on the cheeks.
- Add a black triangle to the nose.
- Draw a few short black stripes along the outer cheeks and forehead.
- Add small white accents near the upper cheeks.
- Use a thin brush to finish the stripes and keep the pattern clean.
Beginner tip: Use fewer, well-spaced stripes. This keeps the design recognizable and prevents the cheeks from becoming too crowded.
Recommended product: Orange, black, and white face paint.
10. Candy Corn Face Paint
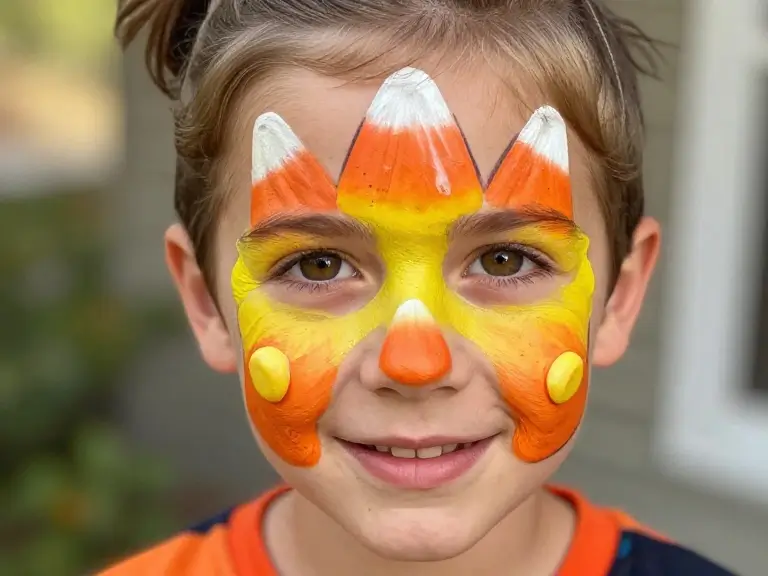
Difficulty: Easy | Time: 5–10 minutes
Candy corn face paint adds a sweet Halloween touch without using a frightening character. The familiar orange, yellow, and white color combination makes the design instantly recognizable.
What you need: Yellow, orange, and white cosmetic face paint.
How to create the look:
- Paint a small triangular candy shape on one cheek.
- Fill the tip with white paint.
- Add a yellow band through the middle.
- Paint the lower section orange.
- Outline the shape lightly if the colors need more definition.
Make it fun: Add two tiny candy shapes or combine the design with a colorful Halloween shirt.
Recommended product: Yellow, orange, and white face paint.
11. Creepy-Cute Zombie Face Paint
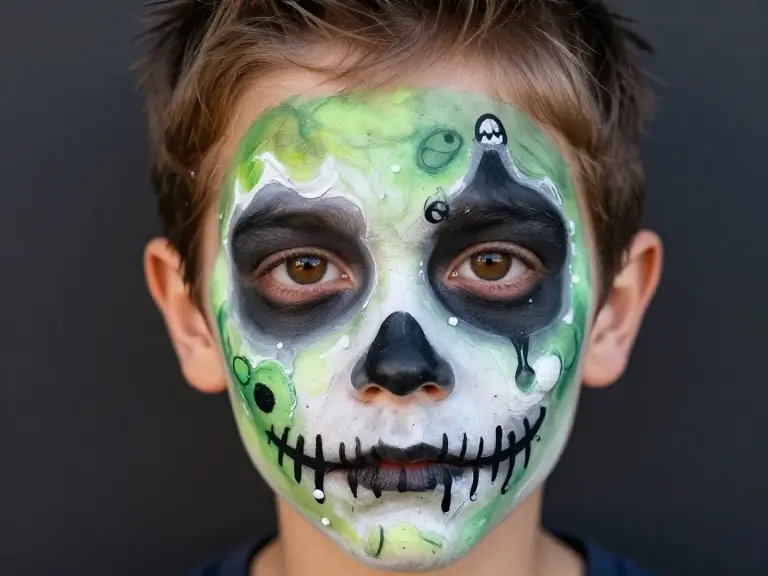
Difficulty: Moderate | Time: 10–15 minutes
Zombie face paint is a fun option for children who want something a little spooky. A cartoon-style design is easier to manage than realistic horror makeup and can be customized to suit your child’s comfort level.
What you need: Green, gray, black, and white face paint.
How to create the look:
- Apply a small patch of green or gray paint to one cheek.
- Add dark circles or simple shadows around the design, staying well away from the eyes.
- Draw a crooked smile using black paint.
- Add a few short stitch-like lines near the mouth.
- Use small white highlights to create a cartoon expression.
Keep it comfortable: Ask your child how spooky they want the design to look. You can leave out dark shadows and stitches for a gentler version.
Recommended product: Green, gray, and black cosmetic face paint.
12. Magical Unicorn Face Paint
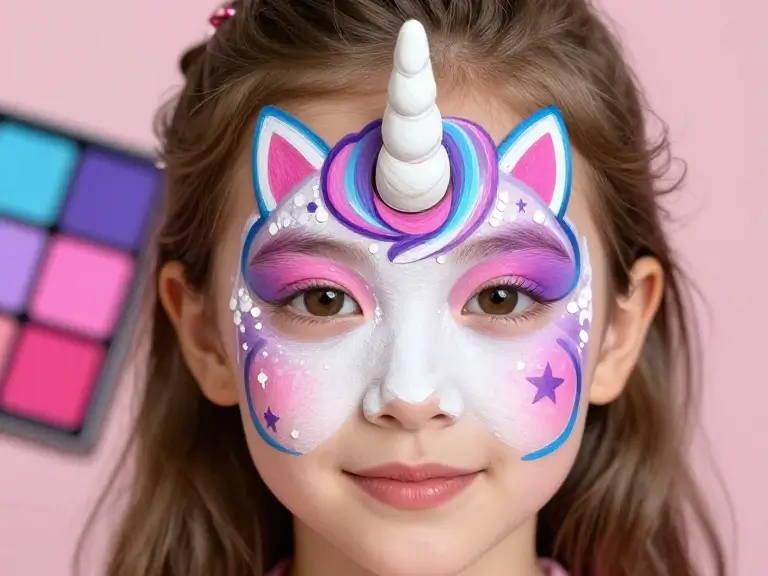
Difficulty: Moderate | Time: 10–15 minutes
A unicorn is a colorful alternative for children who prefer fantasy costumes. The design can feature a small horn on the forehead with pink and purple details around the cheeks.
What you need: White, pink, purple, and blue face paint.
How to create the look:
- Paint a small white horn shape high on the forehead.
- Add two or three short curved lines to suggest a colorful mane.
- Paint pink and purple stars or dots on the cheeks.
- Add blue accents around the outer edges of the design.
- Finish with small white highlights.
Make it special: Match the colors to a unicorn headband or costume. Avoid bulky decorations that could fall into the eyes.
Recommended product: A bright face paint palette.
13. Little Witch Face Paint
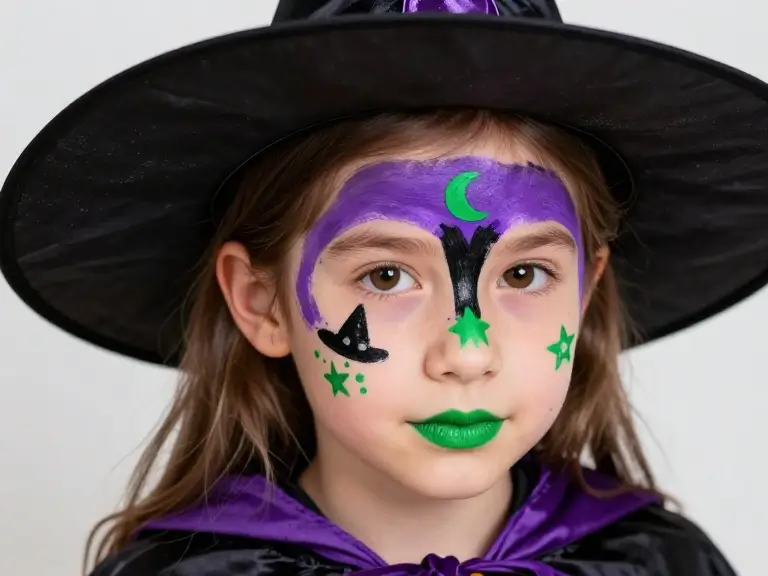
Difficulty: Easy | Time: 5–10 minutes
A witch design can be as simple as a small black hat on the cheek or a purple star beside the eye. It is a practical choice for children who already have a witch costume and need a quick finishing touch.
What you need: Black, purple, and green face paint.
How to create the look:
- Draw a small black witch hat on one cheek.
- Add a purple band across the hat.
- Paint a tiny green star or a few green dots nearby.
- Add a small crescent moon if there is enough space.
- Keep the design compact for a quick application.
Costume pairing: A pointed hat, dark dress, or purple cape completes the Halloween look.
Recommended product: Black, purple, and green face paint.
14. Friendly Vampire Face Paint
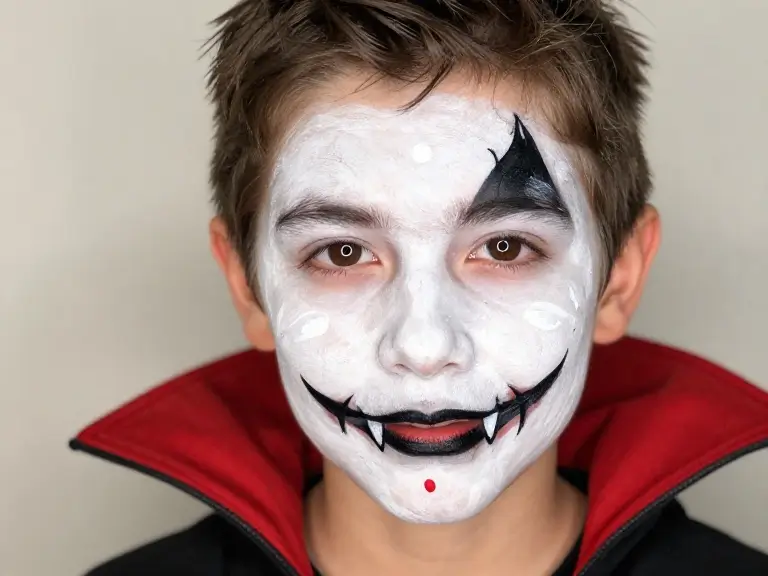
Difficulty: Easy | Time: 5–10 minutes
A vampire look can be created with just a few details. It is ideal for children who want a recognizable Halloween character without a complicated makeup routine.
What you need: White, black, and red face paint specifically labeled for facial use.
How to create the look:
- Add two small white highlights or pale details to the cheeks, if desired.
- Draw two small pointed fangs beside a smiling mouth.
- Add a tiny red drop or accent below one corner of the mouth if your child wants a more dramatic look.
- Outline the fangs with black paint to make them stand out.
- Keep the rest of the face natural or add a small black widow’s-peak shape near the hairline.
Beginner tip: Small fangs and a simple widow’s peak are often enough. You do not need to cover the entire face in white paint.
Recommended product: White, black, and red cosmetic face paint.
15. Spooky Scarecrow Face Paint
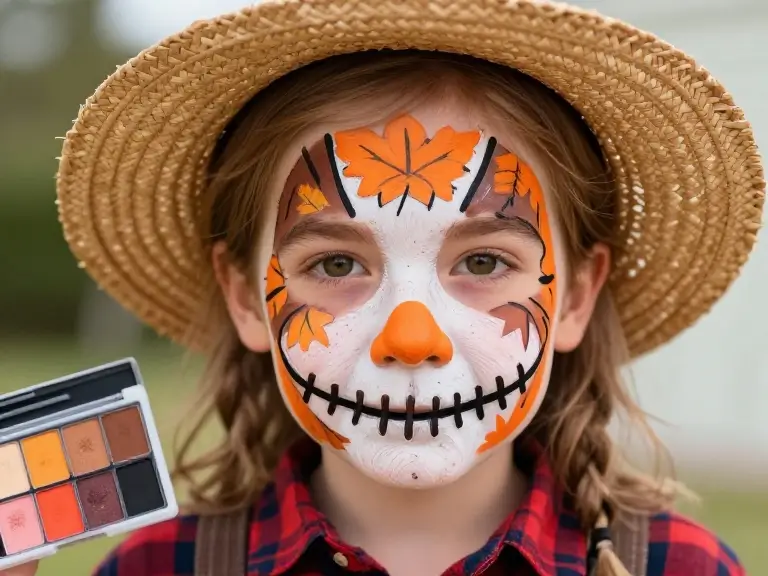
Difficulty: Easy to moderate | Time: 8–12 minutes
Scarecrow face paint combines autumn colors with playful stitched details. It works especially well with plaid shirts, straw hats, and overalls.
What you need: Orange, brown, black, and white face paint.
How to create the look:
- Paint a small orange triangle or circle on the nose.
- Draw short brown or black stitch marks on one cheek.
- Add a few freckles across the cheeks.
- Paint a small smile with short vertical lines at the corners.
- Finish with a few simple leaf shapes in orange or brown.
Make it autumn-inspired: Pair the design with warm-colored clothing and a straw hat. Keep the stitches decorative rather than drawing them over irritated skin.
Recommended product: An autumn-colored face paint palette.
Tips for Better Halloween Face Painting
You do not need professional skills to create attractive face paint. A few basic techniques can make each design easier to apply and more comfortable for your child.
Choose the right face paint
Buy products specifically intended for use on facial skin. Check the ingredient list, labeling, instructions, and warnings. Avoid using craft paint, markers, or other products that are not designed for skin.
A product labeled for children is not automatically suitable for every child, so check the ingredients and follow the manufacturer’s directions.
Recommended product: A clearly labeled cosmetic face painting kit with a visible ingredient list.
Use the right brushes and sponges
A small, fine brush is useful for whiskers, spiderwebs, stripes, and stitches. A cosmetic sponge can help apply an even layer of paint to larger areas.
Keep brushes and sponges clean, and avoid sharing applicators between children without proper cleaning.
Recommended product: Fine face painting brushes and cosmetic sponges.
Practice before Halloween
Try the design on paper first. Practicing the shapes helps you understand how many lines or colors you need before painting your child’s face.
For a first attempt, choose a cat nose, a pumpkin cheek, or a friendly ghost. These designs use simple shapes and are easy to adjust.
Keep the design comfortable
Children may become impatient if a design takes too long. Start with a small area, take breaks when necessary, and let your child choose colors or details.
Avoid applying paint to broken, irritated, or sensitive skin. Keep products away from the eyes and mouth unless the product’s labeling specifically permits the intended use.
Remove the paint properly
Follow the product’s removal instructions and clean the skin gently at the end of the celebration. Do not leave face paint on overnight. Stop using it and remove it if irritation develops.
Face Painting Safety Tips for Kids
Before applying Halloween face paint, take a few precautions:
- Perform a patch test: Test the product according to its instructions, ideally 24–48 hours before the event when appropriate. A patch test can help identify a reaction but cannot guarantee that one will not occur.
- Read the label: Check ingredients, warnings, age guidance, and instructions for use.
- Keep paint away from the eyes: Do not use products around the eyes unless their labeling permits that use.
- Avoid craft supplies: Use only paints and decorative products intended for the skin and the area being painted.
- Use clean tools: Wash hands and clean applicators. Do not share face paint or brushes between children without appropriate cleaning.
- Check the product’s condition: Avoid paint with an unusual or unpleasant smell, damaged packaging, or unclear labeling.
- Remove paint after use: Follow the manufacturer’s instructions and stop immediately if redness, swelling, or irritation occurs.
For additional guidance, read the U.S. Food and Drug Administration’s advice on novelty makeup and the American Academy of Pediatrics’ face paint and makeup safety guidance.
Frequently Asked Questions
1. What is the easiest Halloween face paint for kids?
A black cat nose with whiskers, a small pumpkin, and a friendly ghost are good beginner options. They use simple shapes and only a few colors, making them suitable for quick Halloween preparations.
2. What face paint should I use on children?
Choose face paint specifically intended for cosmetic use on the face. Read the ingredient list and instructions, buy from reputable sellers, and follow any age restrictions and warnings. No product can be assumed safe for every child.
3. How long does it take to paint a child’s face for Halloween?
A simple design may take around five to ten minutes, while a more detailed butterfly, tiger, or skeleton can take ten to fifteen minutes or longer. These are estimates; the time depends on the child’s comfort and the design’s complexity.
4. Can I use regular craft paint for Halloween face painting?
No. Craft paint is not designed for application to facial skin. Use cosmetic products intended for face painting and follow their labeling and safety instructions.
5. How can I make Halloween face painting easier for beginners?
Choose one small design, prepare your supplies in advance, practice on paper, and use a fine brush for details. Start with the main shape and add only a few decorative lines or dots.
6. How do I remove Halloween face paint from my child’s face?
Follow the manufacturer’s removal directions. Use the recommended cleanser or removal method, work gently, and avoid scrubbing the skin. Remove the paint promptly after the celebration.
7. How can I keep face paint from irritating my child’s skin?
Check the ingredients, follow the product directions, and conduct a patch test in advance. Avoid applying paint to broken or irritated skin, keep it away from areas where use is not permitted, and stop if a reaction develops.
8. What face painting supplies do beginners need?
A beginner can start with a small selection of cosmetic face paint, a fine brush, a clean cosmetic sponge, water if the product requires it, and a clean towel. You do not need a large professional kit to create simple Halloween designs.
Conclusion
These easy Halloween face painting ideas for kids offer something for every costume, from a cute black cat and happy pumpkin to a colorful butterfly and friendly vampire. Start with a simple design, choose colors your child enjoys, and focus on a few clean details rather than trying to make the makeup perfect.
Prepare the supplies ahead of time, use products specifically intended for facial skin, and follow the manufacturer’s safety instructions. With a little practice, you can create a fun Halloween look that complements your child’s costume without making preparations stressful.