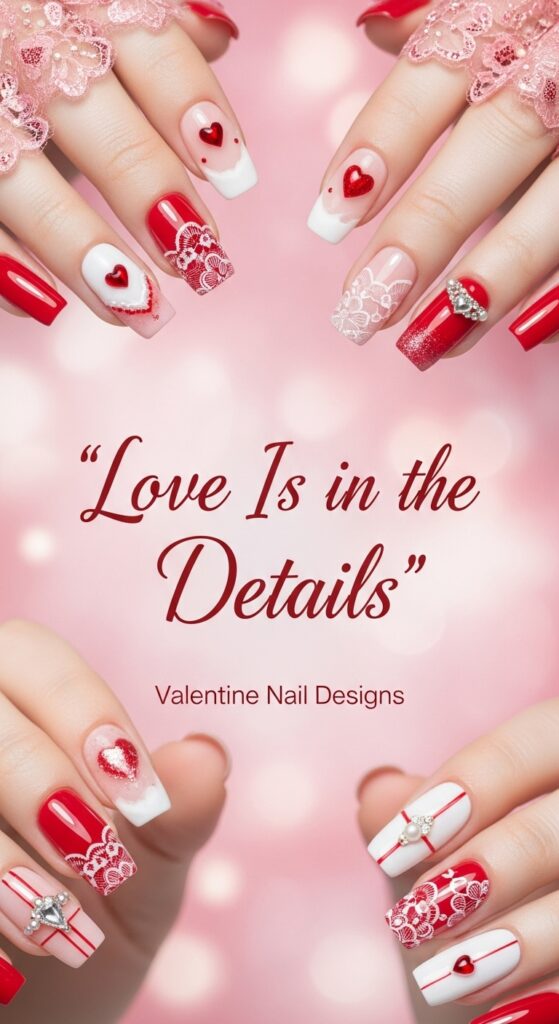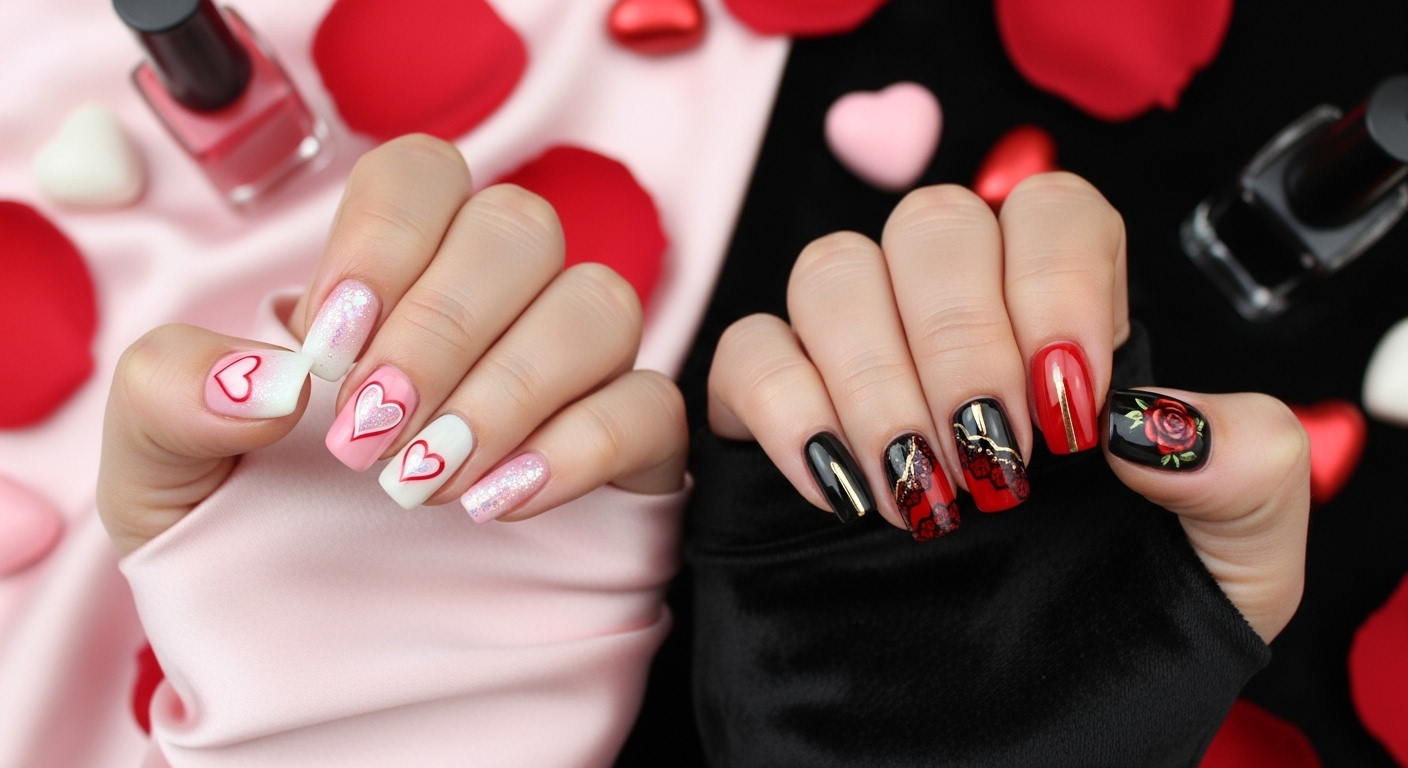
Valentine’s Day is a lovely excuse to experiment with nail colors, delicate heart patterns, shimmering finishes, and romantic details. Whether you prefer classic red polish or something more unexpected, the right manicure can complement your outfit and reflect your personal style.
The best part? You don’t need elaborate nail art skills to create a beautiful Valentine’s manicure. Some designs require only a dotting tool and two nail polishes, while others look best with a little extra patience or a visit to a professional nail technician.
In this guide, you’ll find 15 Valentine nails ideas for different styles, nail lengths, and skill levels. Each look includes color suggestions, application tips, and practical advice to help you decide which design works best for your plans.
How to Choose the Right Valentine Nail Design
Before picking a design, think about how you want your nails to look and how much maintenance you’re comfortable with.
- For a classic romantic look: Choose red hearts, soft pink ombre, or French tips.
- For a minimalist manicure: Try nude polish with fine lines or a single heart accent.
- For something glamorous: Consider rose gold glitter, velvet-effect reds, or holographic hearts.
- For a playful style: Candy-heart lettering, neon designs, and polka dots offer plenty of personality.
- For short nails: Small hearts, simple dots, and narrow French tips can look balanced without crowding the nail.
- For longer nails: Ombre gradients, floral details, and more elaborate patterns have additional room to stand out.
You can adapt nearly every design to natural nails, press-ons, or extensions. The key is choosing a version that suits your nail length, available tools, and everyday activities.
1. Classic Red Hearts: Timeless Romance on Point
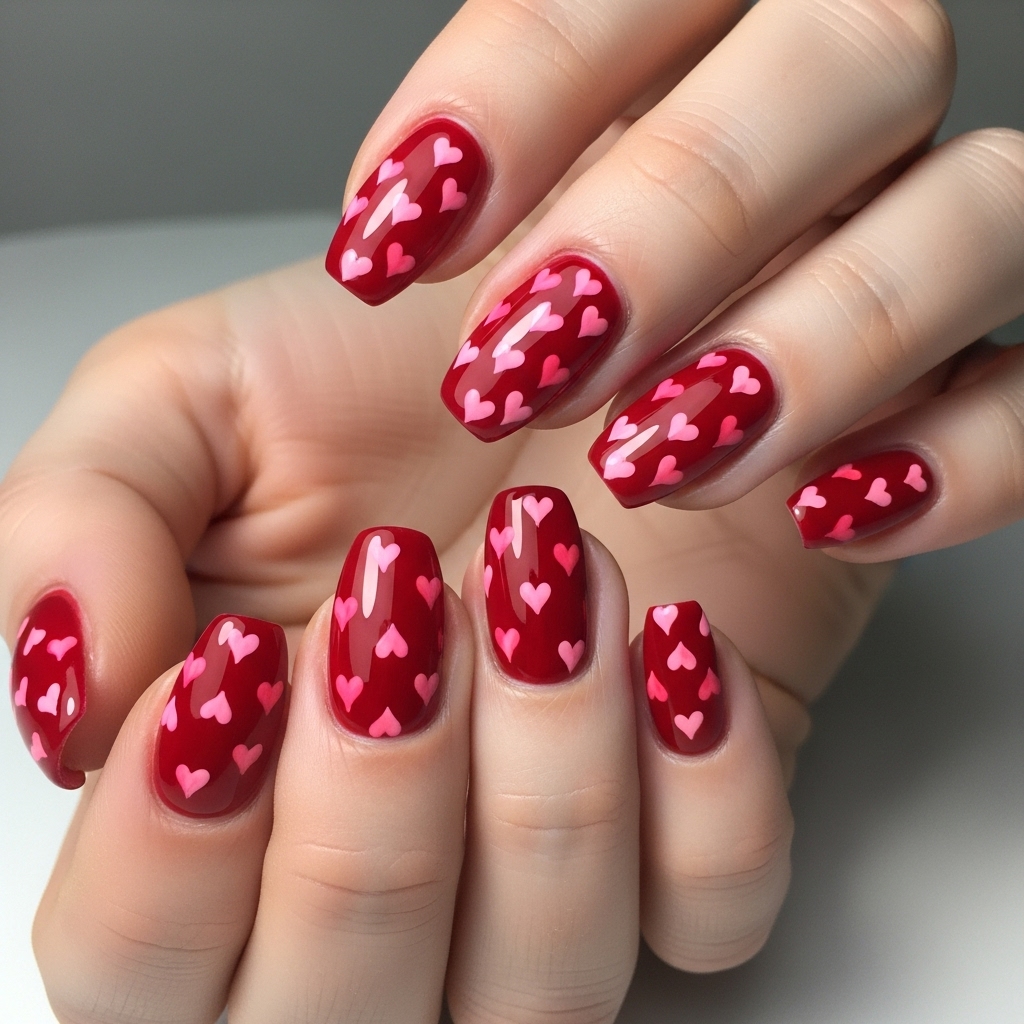
Classic red nails and tiny heart details make an easy choice for anyone who loves traditional Valentine’s colors. A glossy crimson base feels bold, while a few small hearts add a playful touch without making the manicure look too busy.
How to create the look
- Shape your nails and gently clean the nail surface.
- Apply a suitable base coat, followed by two thin coats of red polish.
- Once the color is dry, use a dotting tool to place two small dots close together.
- Pull the dots downward with a fine brush to form a heart.
- Allow the design to dry before applying a compatible top coat.
Styling tip: Place one heart on each ring finger for a subtle accent, or scatter smaller hearts across every nail for a more decorative finish.
Best for: Classic romantic outfits, date nights, and anyone who enjoys traditional red manicures.
Works on: Short, medium, and long nails.

2. Soft Pink Ombre: Blush of First Love
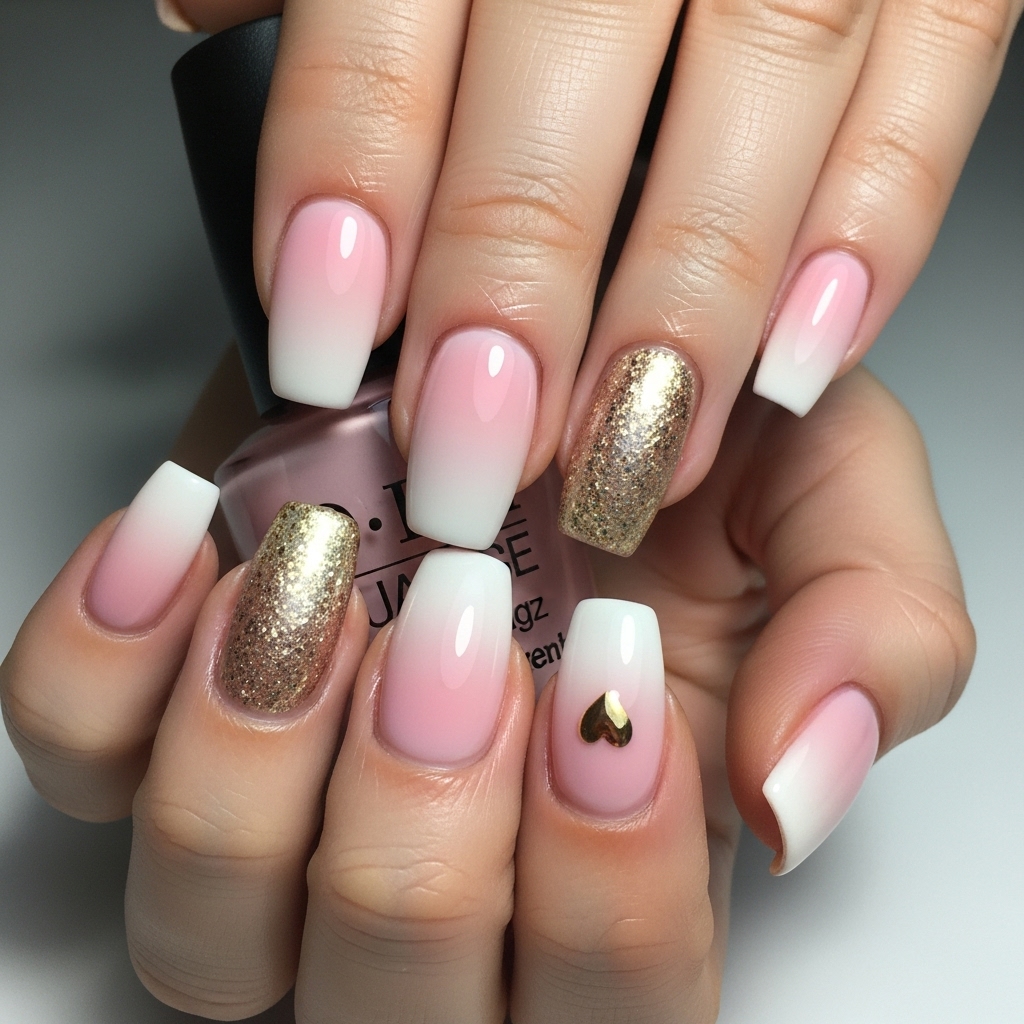
Soft pink ombre nails create a gentle transition between nude and blush tones. Instead of using a bold pattern, this design relies on the gradual blend of colors to create a polished, understated appearance.
It is especially appealing if you want a Valentine’s manicure that remains suitable for work, everyday errands, and other occasions after February 14.
How to create the look
- Apply a sheer nude or pale pink base coat.
- Place a small amount of baby-pink polish onto a makeup sponge.
- Lightly dab the sponge near the nail tips, building the color gradually.
- Repeat with thin layers until the gradient looks even.
- Clean the skin around your nails and finish with a compatible top coat.
Styling tip: Add one tiny white heart to an accent nail if you want a more obvious Valentine’s theme. Leave the remaining nails simple to keep the design balanced.
Best for: Minimalist wardrobes, soft romantic outfits, and people who prefer subtle nail art.
Works on: Short to long nails, although longer nails provide more space for a visible gradient.
3. Glittery Rose Gold: Luxe Love Glow-Up
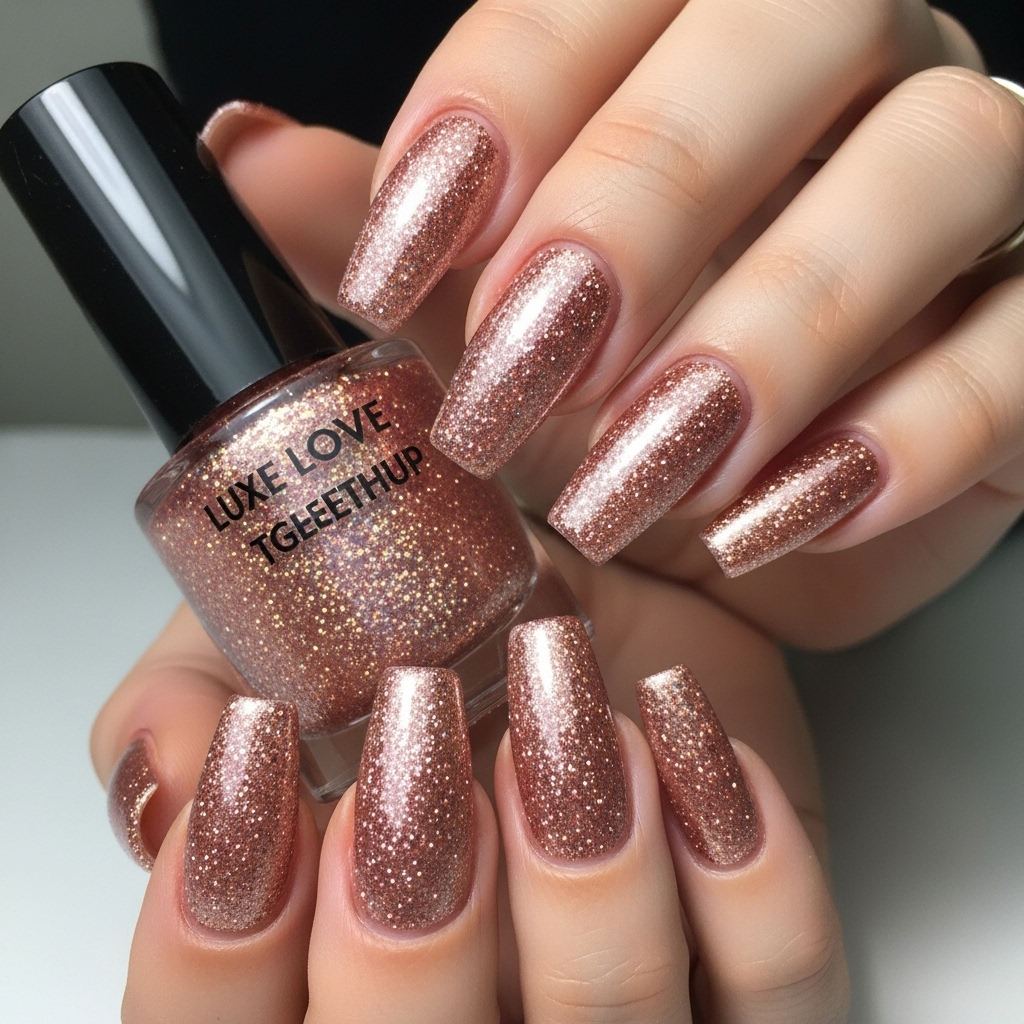
Rose gold combines warm pink tones with a metallic finish, making it an attractive alternative to traditional red and silver nail art. Glitter adds dimension and catches the light, which can make even a simple manicure feel more dressed up.
You can cover every nail in shimmer or use glitter on just one or two fingers to keep the look understated.
How to create the look
- Apply a base coat and allow it to dry.
- Choose a rose gold glitter polish or a compatible glitter product intended for nail use.
- Apply thin layers until you achieve your preferred coverage.
- Concentrate additional glitter near the tips if you want a gradual sparkle effect.
- Seal the design with a suitable top coat.
Styling tip: Pair rose gold nails with neutral clothing, black evening wear, or simple gold-toned accessories. If your glitter is chunky, use a top coat designed to smooth textured nail finishes.
Best for: Dinner dates, celebrations, parties, and anyone who likes a glamorous manicure.
Works on: Most nail lengths and shapes.
4. Lace Detail Nails: Vintage Sweetheart Vibes
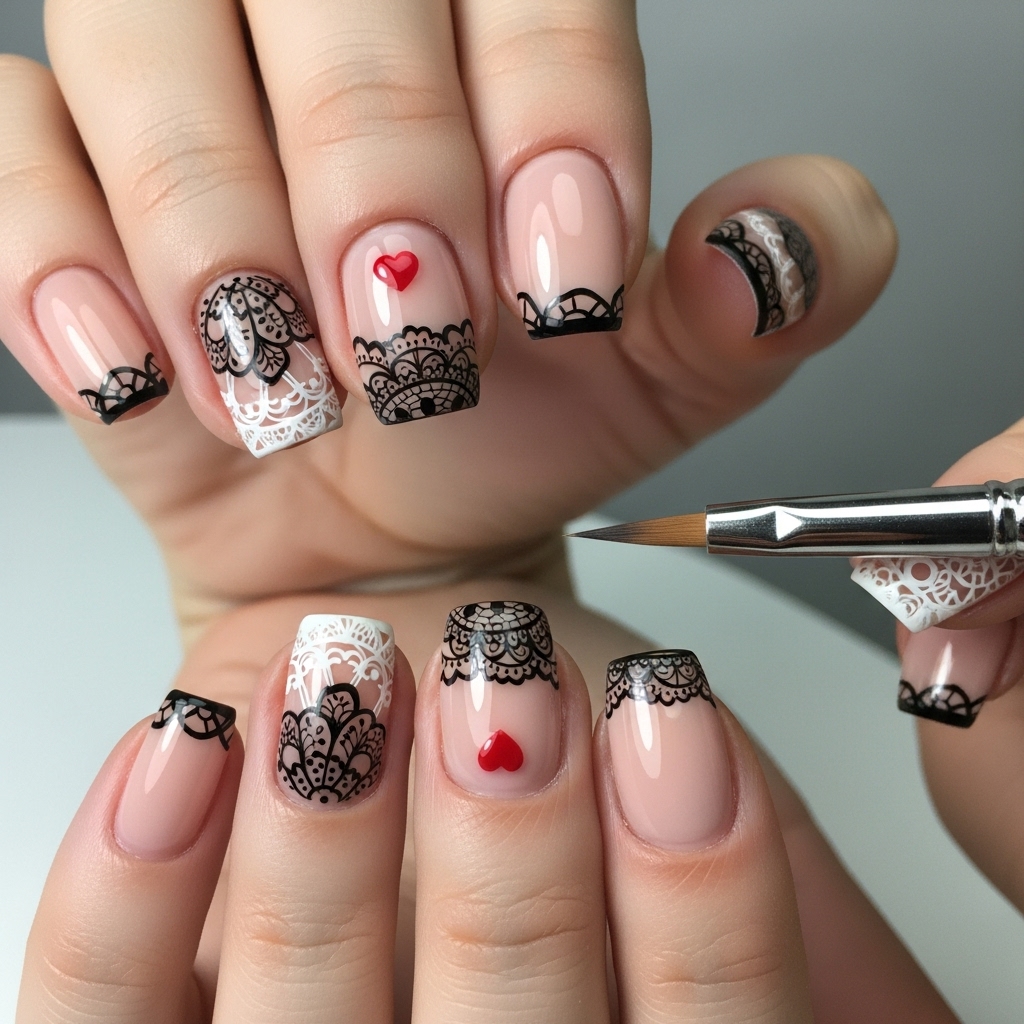
Lace-inspired nail art brings a delicate, vintage feel to a Valentine’s manicure. Fine white patterns over a nude or blush base resemble embroidered fabric, while black lace details create a stronger contrast.
Because lace patterns contain small lines and repeated shapes, they tend to look best when the design is kept relatively simple.
How to create the look
- Apply a nude, sheer pink, or milky white base.
- Allow the base color to dry completely.
- Use a fine nail-art brush to draw small arches, curved lines, and dots.
- Repeat the pattern on one or two accent nails before attempting all ten.
- Finish with a top coat that will not excessively blur the design.
A lace stamping plate can make the process easier if drawing tiny details by hand feels difficult.
Styling tip: White lace on a nude base creates a soft bridal-inspired appearance. Black lace on pale pink looks more dramatic and works well for evening outfits.
Best for: Vintage-inspired fashion, elegant occasions, and intricate nail-art enthusiasts.
Works on: Medium and long nails, although a small lace accent also works on short nails.
5. Chocolate Kiss Browns: Cozy Couple Goals
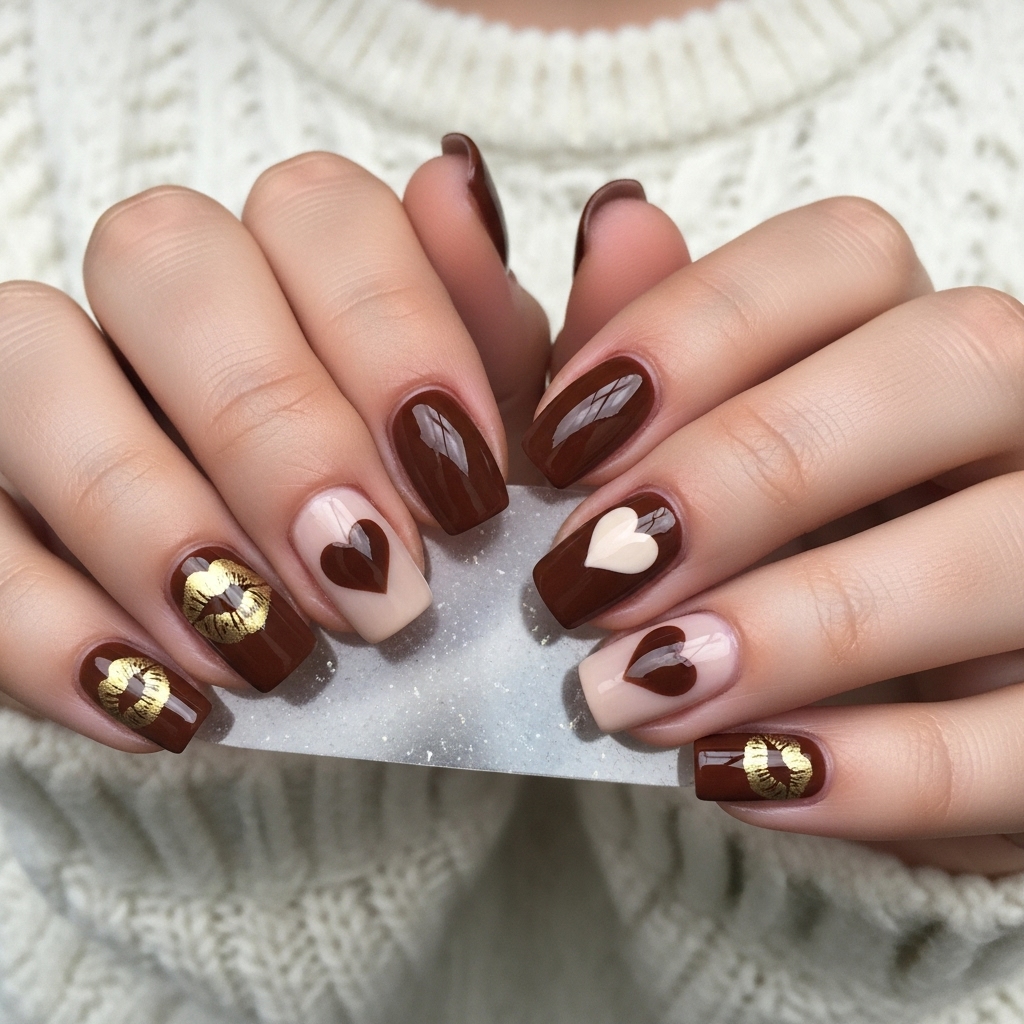
Chocolate brown offers a warmer, more understated alternative to bright red. Pairing it with nude accents, tiny hearts, or negative-space details creates a manicure that feels romantic without relying on the usual pink-and-red palette.
This is also a practical choice if you want a design that remains wearable long after Valentine’s Day.
How to create the look
- Apply a base coat and two thin coats of chocolate-brown polish.
- Leave one or two nails nude or pale beige for contrast.
- Add a small brown or red heart using a dotting tool and fine brush.
- Alternatively, create a heart-shaped negative-space detail by leaving part of the nail unpainted.
- Finish with a glossy top coat for a smooth, polished surface.
Styling tip: Combine chocolate brown with cream, beige, blush pink, or gold accents. For a more modern result, use a matte top coat on the brown nails and leave the accent nails glossy.
Best for: Neutral outfits, cozy winter styling, and anyone who prefers understated nail colors.
Works on: Short, medium, and long nails.
6. Neon Hearts Pop: Bold Love Rebels
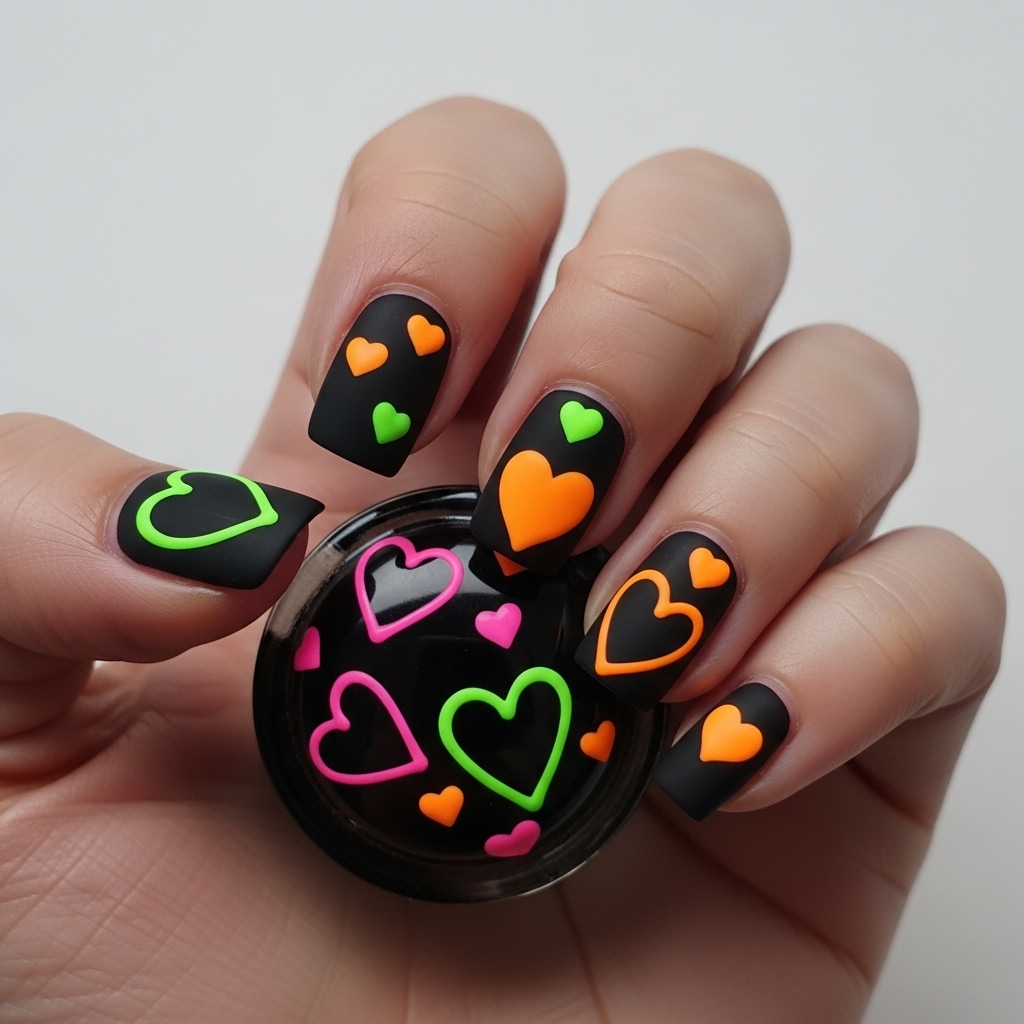
Who says Valentine’s nails must be soft and delicate? Neon hearts offer a brighter alternative for anyone who enjoys graphic patterns and unconventional color combinations.
Hot pink, electric orange, lime green, and bright purple stand out especially well against black or deep navy polish. The contrast gives the design a modern, playful appearance.
How to create the look
- Apply a base coat and allow it to dry.
- Paint your nails black or another dark shade.
- Use a dotting tool and a fine brush to create neon hearts in different sizes.
- Leave some empty space between the shapes so the pattern remains clear.
- Apply a compatible glossy top coat after the design has dried.
Styling tip: Limit the design to two or three neon shades if you want a coordinated look. For a more dramatic manicure, alternate the colors across your fingers.
Best for: Creative personalities, colorful outfits, and people who prefer statement nail art.
Works on: All nail lengths, including short nails with smaller heart patterns.
7. Velvet Texture Reds: Plush Passion
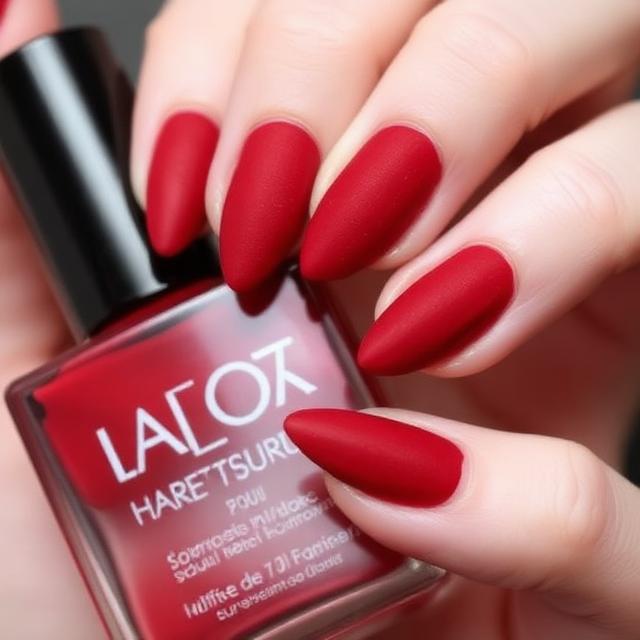
Velvet-effect nails create the appearance of soft, multidimensional shimmer. Red magnetic polish is a particularly attractive option for Valentine’s Day because it combines a romantic color with a shifting, light-catching finish.
Unlike ordinary matte polish, magnetic velvet effects depend on specially formulated magnetic nail products.
How to create the look
- Prepare the nails and apply the base coat recommended for your chosen polish.
- Apply a thin coat of red magnetic polish.
- Hold the appropriate magnet near the nail according to the product instructions to create the desired light pattern.
- Repeat with another coat if needed, using the magnet as directed.
- Cure the product in the specified lamp if it is a gel formula, then finish according to the manufacturer’s instructions.
Styling tip: Choose a deep cherry or burgundy shade for a dramatic effect. A brighter ruby red creates a more traditional Valentine’s look.
Best for: Evening events, statement manicures, and people who enjoy dimensional finishes.
Works on: Short to long nails.
8. Minimalist Line Art: Subtle Soulmate Style
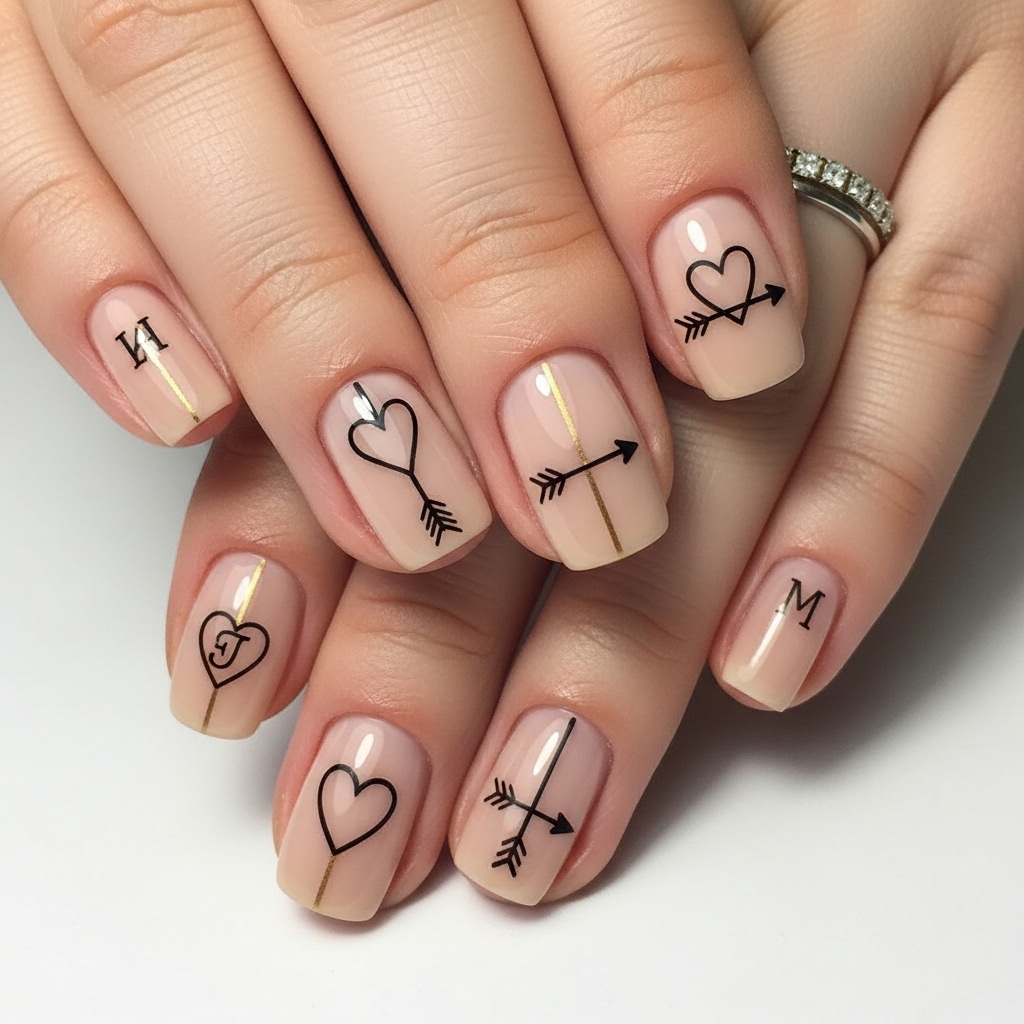
Minimalist nail art proves that a romantic manicure does not need to be covered in hearts. A nude base with fine black, white, or gold lines can look elegant while still allowing a small Valentine’s detail to stand out.
Try drawing a tiny heart outline on one nail or using a continuous curved line to create a more abstract design.
How to create the look
- Apply a sheer nude or pale pink base.
- Allow the polish to dry fully.
- Use a fine liner brush to draw a small heart, curved line, or simple arrow.
- Keep the design limited to one or two colors.
- Finish with a clear top coat once the artwork has dried.
Styling tip: Gold lines create a warmer finish, while black lines provide a sharper contrast. If your hands are often occupied with typing or other daily tasks, small designs on short nails can be easier to maintain.
Best for: Minimalist fashion, everyday wear, and people who prefer understated nail art.
Works on: All nail lengths.
9. Galaxy Love Swirls: Cosmic Connection
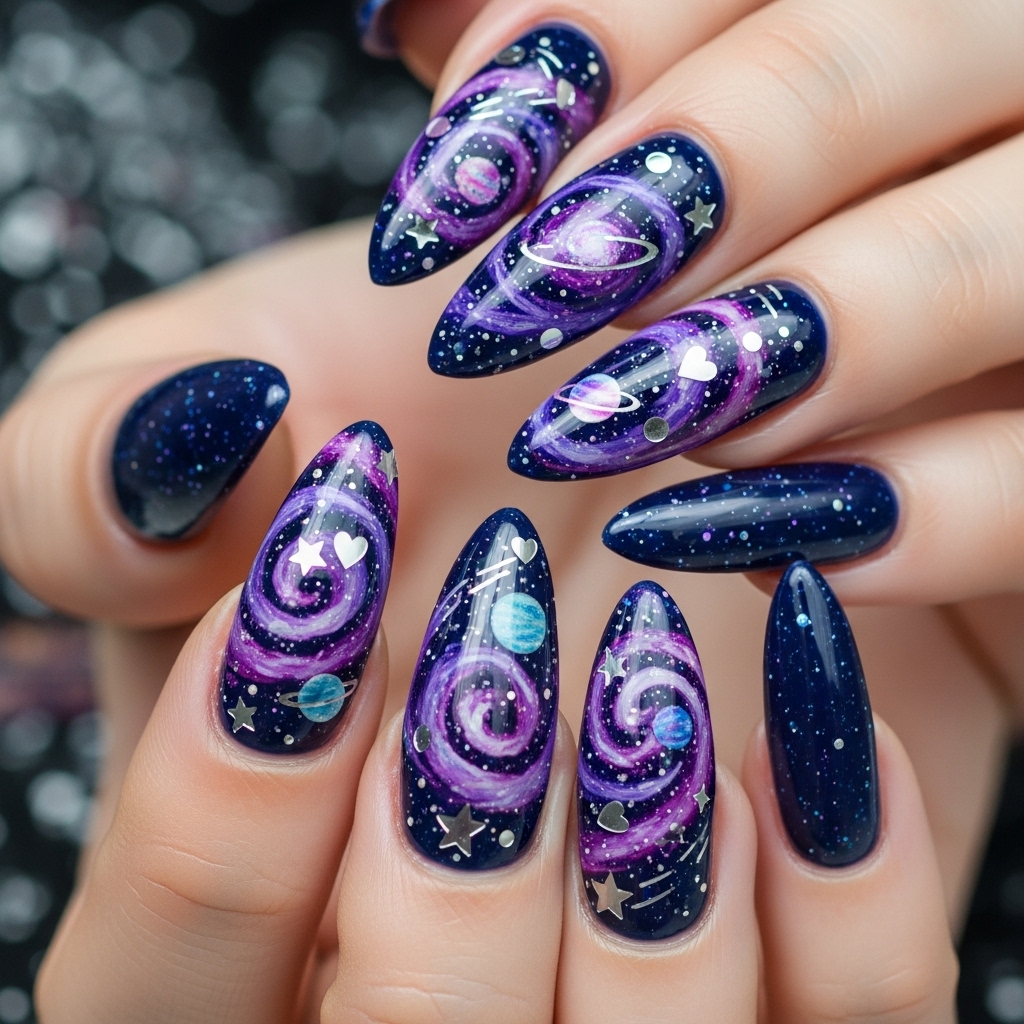
Galaxy-inspired nails combine purples, pinks, deep blues, and tiny star details to create a cosmic effect. Adding a few hearts makes the design suitable for Valentine’s Day without losing its dreamy, celestial appearance.
The secret is layering the colors rather than blending everything into one uniform shade.
How to create the look
- Apply a deep navy or purple base.
- Use a small sponge to dab pink and violet polish in irregular patches.
- Add tiny white dots to suggest stars.
- Paint one or two small hearts using a fine brush.
- Apply a compatible top coat to smooth and protect the finished design.
Styling tip: Use dark colors as the background and reserve brighter shades for the central swirls. Too many competing colors can make the details difficult to distinguish.
Best for: Creative nail-art fans, celestial aesthetics, and anyone looking for an alternative to conventional Valentine’s designs.
Works on: Medium and long nails, although simplified galaxy accents can work on short nails.
10. Candy Heart Quotes: Playful Sweet Talk
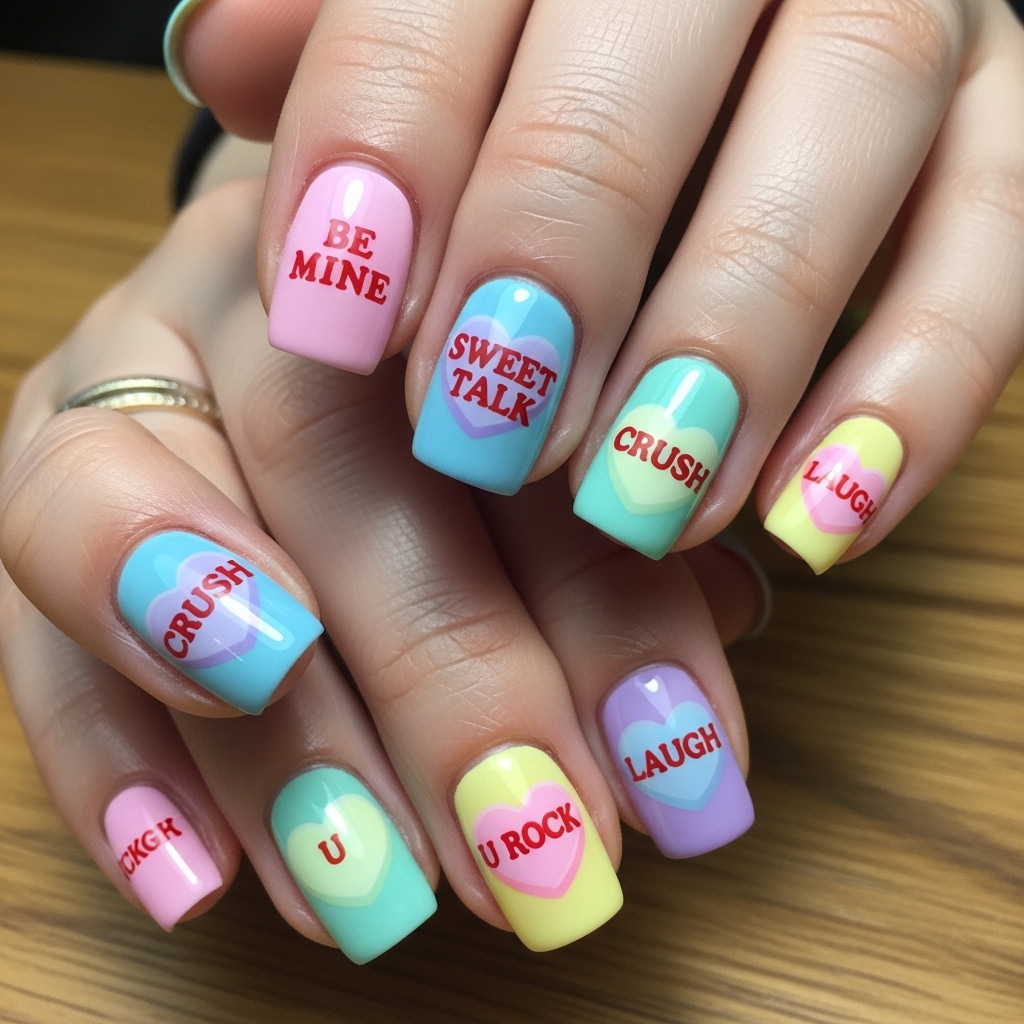
Inspired by Valentine’s candy, this design features pastel backgrounds and tiny heart-shaped messages. Words such as “LOVE,” “XOXO,” and “BE MINE” create a playful look that feels more fun than formal.
Because nails provide limited space, the lettering needs to be small enough to fit comfortably without becoming difficult to read.
How to create the look
- Paint each nail a pastel shade, such as mint, lavender, pale pink, or yellow.
- Draw small heart shapes using a fine brush.
- Allow the shapes to dry before adding short lettering with a detail brush or suitable nail-art stickers.
- Use one short word per accent nail rather than squeezing long messages onto every finger.
- Seal the design with a compatible top coat.
Styling tip: If hand-painted letters are difficult, use miniature nail decals. This can produce a cleaner result with less effort.
Best for: Playful outfits, casual dates, and anyone who enjoys colorful, nostalgic designs.
Works on: All nail lengths, although shorter words are easier to fit on small nails.
11. French Tip Hearts: Elevated Elegance
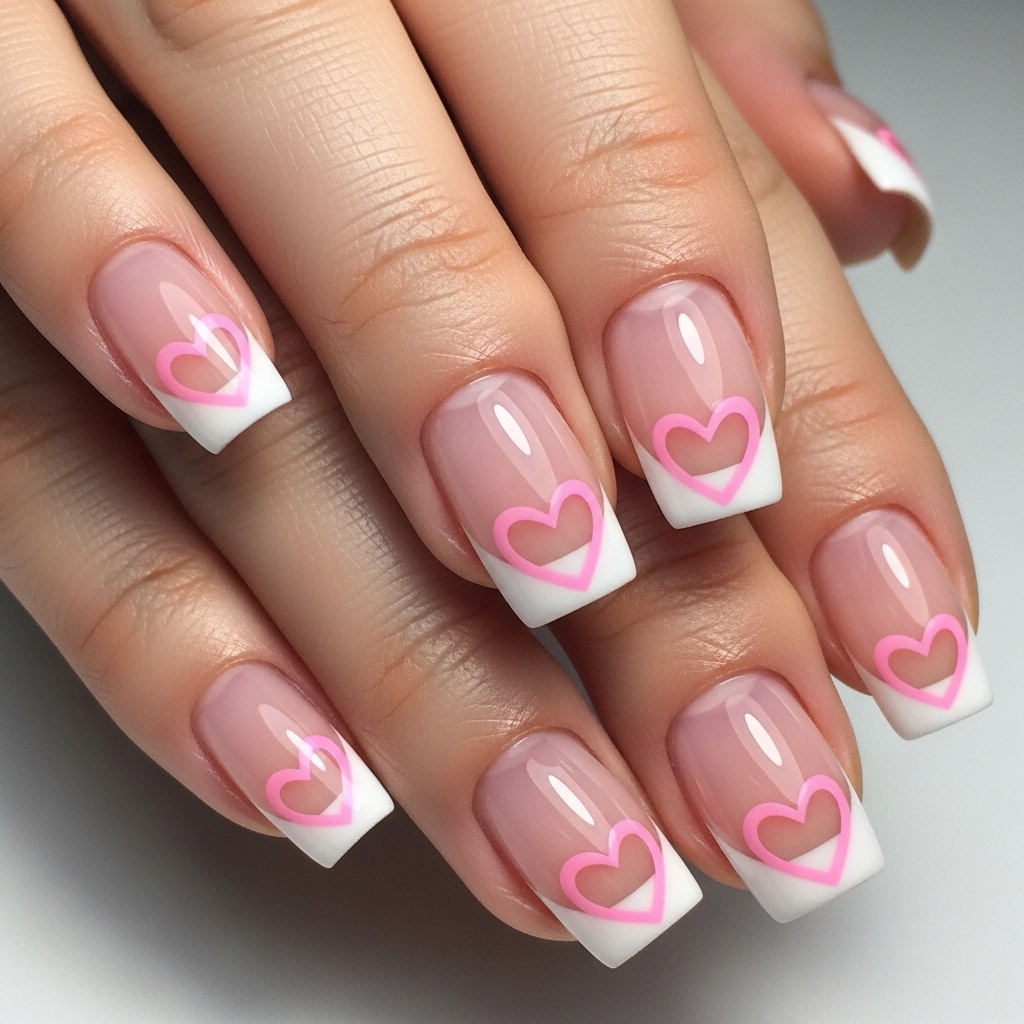
French manicures are known for their clean, polished appearance. Adding heart-shaped tips or a tiny heart near the edge gives the classic design a Valentine’s update without making it overly decorative.
You can use traditional white tips, soft pink tips, or a combination of red and pink.
How to create the look
- Apply a sheer nude or pink base.
- Allow it to dry before shaping the tips.
- Use a fine brush or nail stencil to create curved French tips.
- Add a small heart to one or two nails using a dotting tool.
- Finish with a glossy top coat.
For heart-shaped tips, draw two rounded curves that meet in a point. Take your time with the symmetry; even small differences can change the appearance of the design.
Styling tip: Use narrow tips on short nails to preserve the appearance of space on the nail plate. Wider tips can make a bolder statement on longer nails.
Best for: Elegant dates, special occasions, and people who want a classic manicure with a seasonal detail.
Works on: Short, medium, and long nails.
12. Floral Romance Blooms: Garden of Love
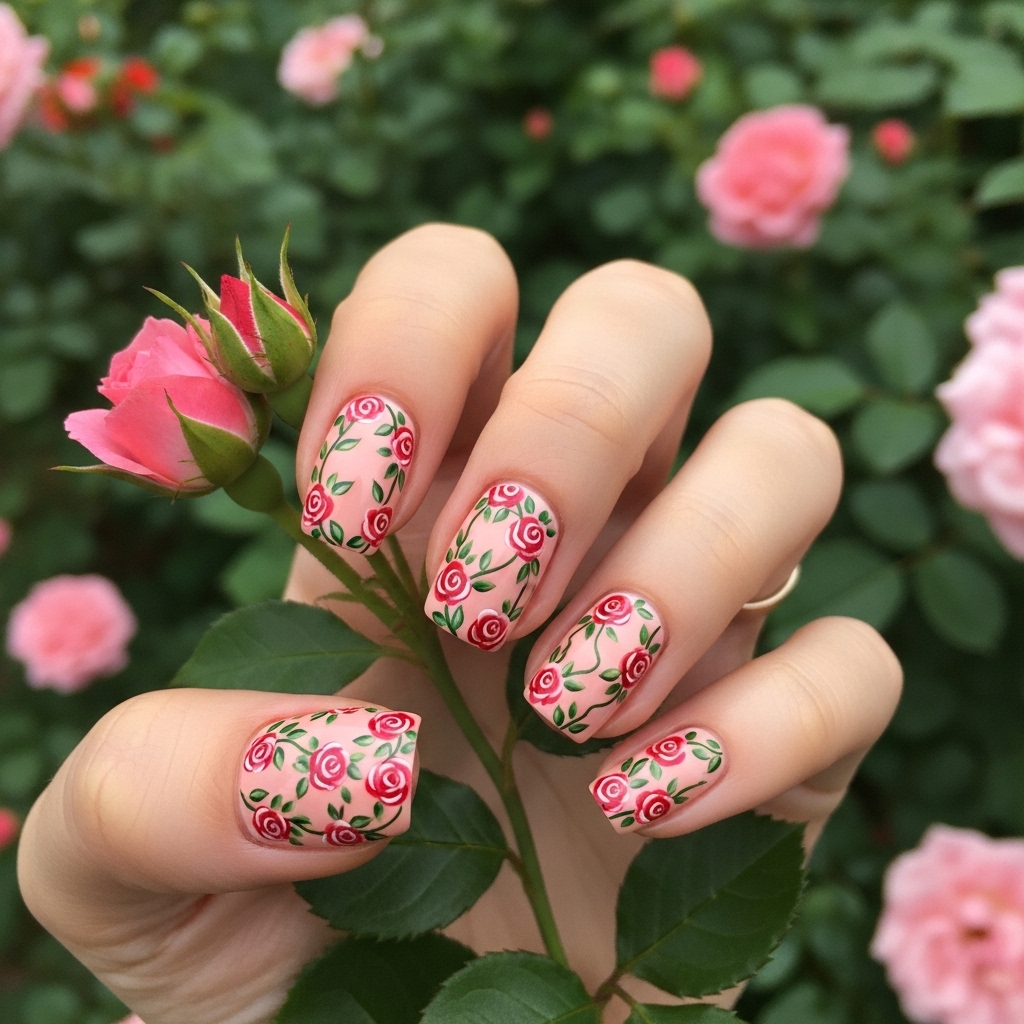
Tiny roses, delicate petals, and green vines give Valentine’s nails a softer, garden-inspired appearance. This design works particularly well with pale peach, creamy white, and blush-pink backgrounds.
You don’t need to paint a detailed rose on every nail. A few simple flowers can create a more balanced result.
How to create the look
- Apply a pale peach, nude, or blush base.
- Use a dotting tool to place five small pink or red dots in a circle.
- Add a smaller dot or short curved stroke to the center of each flower.
- Draw a few thin green leaves with a fine brush.
- Allow the artwork to dry and finish with a top coat.
Styling tip: Keep the background light so the petals remain visible. If you want a more dramatic appearance, use burgundy flowers against a deeper rose-colored base.
Best for: Romantic outfits, spring-inspired styling, and people who enjoy delicate patterns.
Works on: Medium and long nails, with simplified flowers suitable for shorter nails.
13. Holographic Hearts: Shimmering Surprise
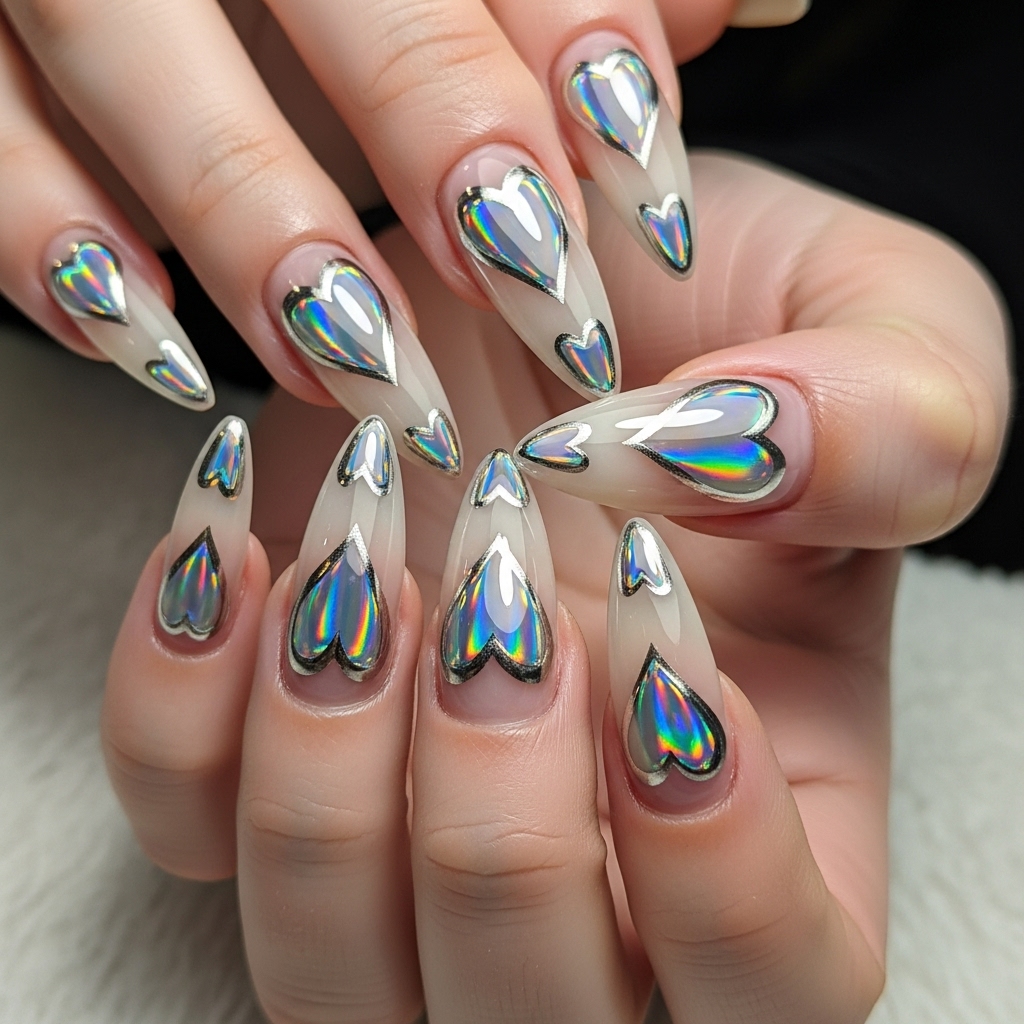
Holographic nails reflect different colors as the light changes. Combined with heart motifs, they offer a playful alternative to ordinary glitter polish.
The effect can be created with holographic polish or with nail products specifically designed to produce a reflective finish.
How to create the look
- Apply a base coat and choose a pale pink, nude, or dark background.
- Add holographic polish according to its product instructions.
- Use a fine brush or heart stencil to create contrasting heart shapes.
- If using a specialty powder, follow its specified application method and compatible base and top coats.
- Finish the manicure as directed by the product manufacturer.
Styling tip: Pair holographic hearts with a relatively simple base color. This allows the reflective finish to remain the focal point.
Best for: Party outfits, statement manicures, and anyone who enjoys futuristic finishes.
Works on: All nail lengths.
14. Polka Dot Kisses: Retro Playfulness
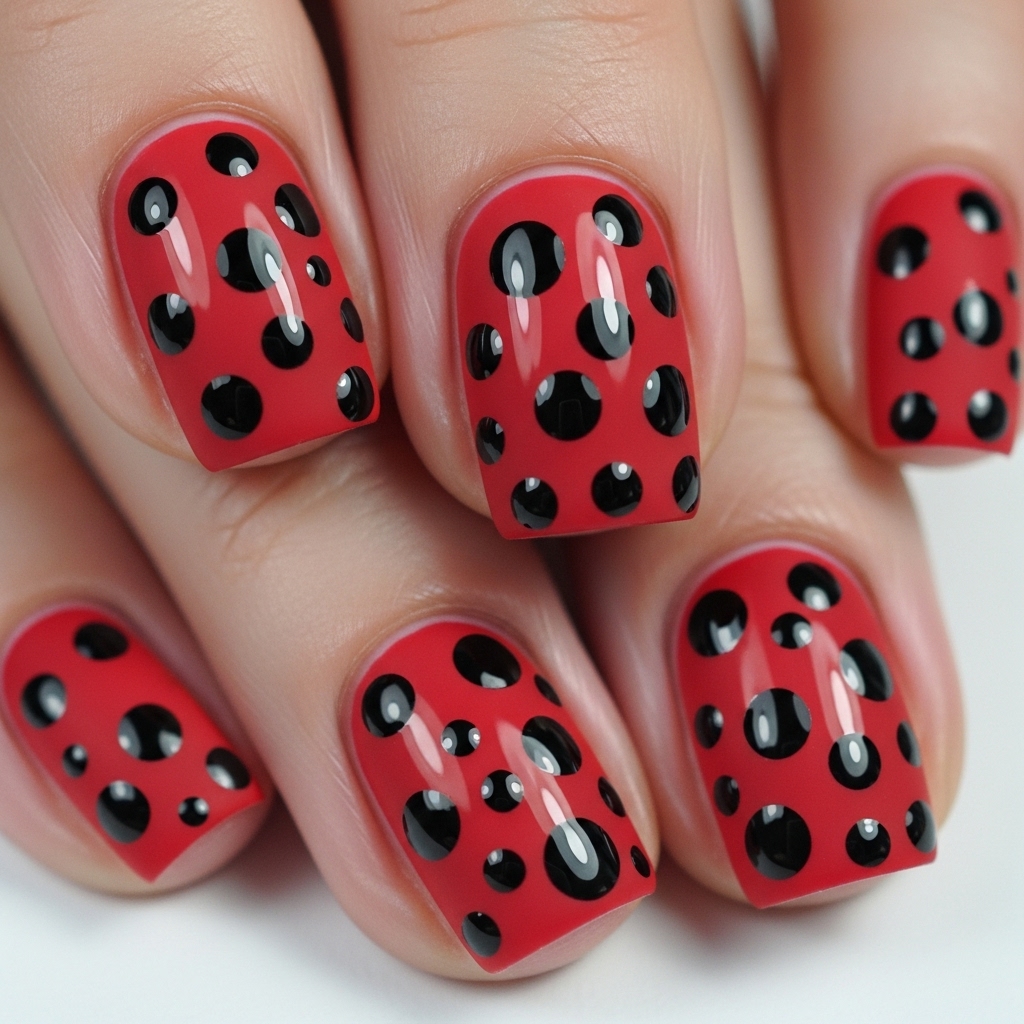
Red polish and contrasting black or white dots create a retro look inspired by vintage fashion. Add a tiny heart on an accent nail to make the design feel more connected to Valentine’s Day.
The appeal of polka dots is their simplicity: the pattern is easy to customize and does not require advanced drawing skills.
How to create the look
- Apply a red base coat and allow the color to dry.
- Dip a dotting tool into black or white polish.
- Place dots in evenly spaced rows or arrange them in a loose pattern.
- Add a small heart on one nail if you want an extra romantic detail.
- Seal the design with a top coat once the dots have dried.
Styling tip: Use smaller dots for a delicate finish and larger dots for a bolder, more playful manicure. Keep the spacing consistent if you prefer a polished vintage look.
Best for: Retro outfits, casual dates, and beginners experimenting with nail art.
Works on: Short, medium, and long nails.
15. Ombre Sunset Love: Epic Duo Energy
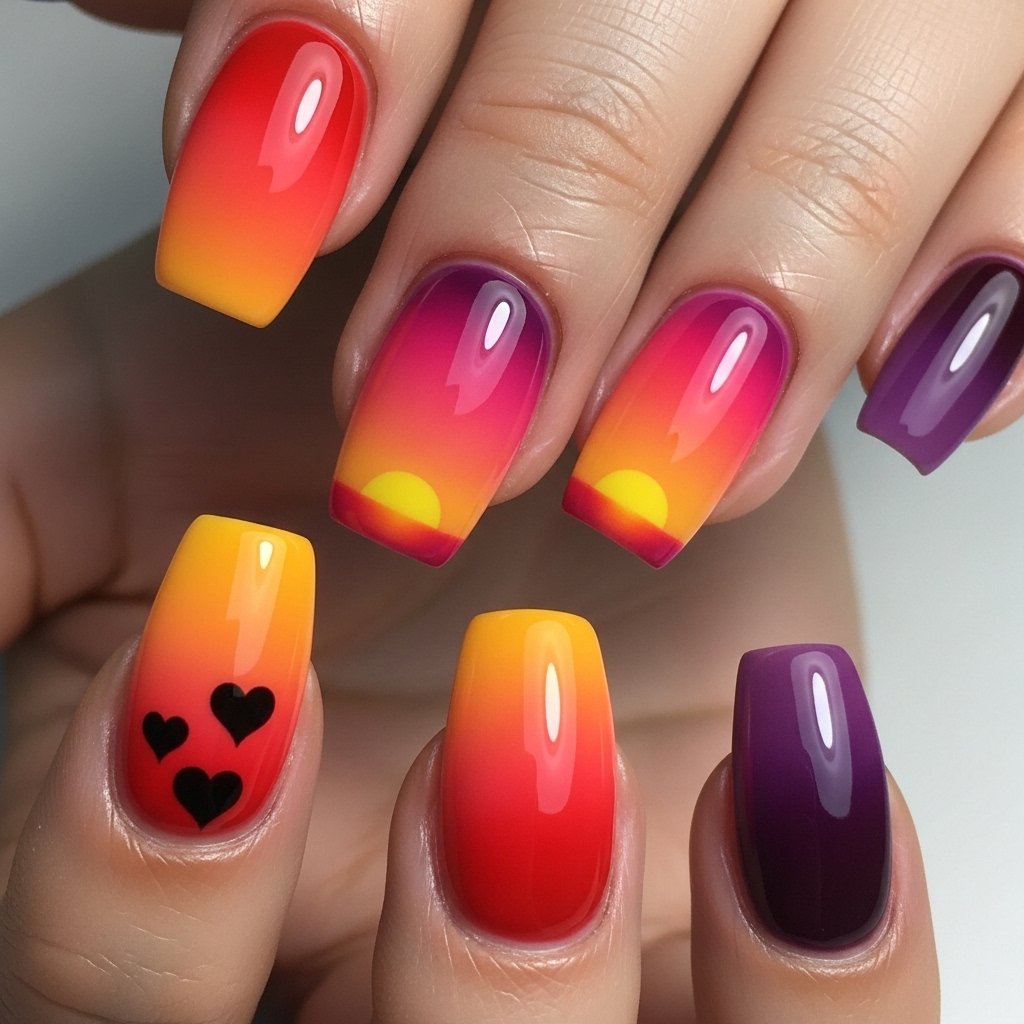
Sunset ombre nails combine warm orange, coral, pink, and purple tones to create a colorful gradient. A small heart silhouette adds a romantic detail without distracting from the blend.
Unlike traditional red manicures, this design uses a broader color palette and can be adapted to brighter or more muted preferences.
How to create the look
- Apply a base coat and choose three coordinating shades, such as orange, pink, and purple.
- Paint a thin layer of the lightest shade as your base.
- Place the colors next to one another on a small makeup sponge.
- Gently dab the sponge onto the nail, repeating with thin layers until the colors blend.
- Add a small heart using a contrasting polish and finish with a compatible top coat.
Styling tip: Choose colors with similar undertones for a smoother gradient. For example, coral, warm pink, and violet usually blend more naturally than unrelated shades.
Best for: Colorful outfits, sunset-inspired aesthetics, and anyone who prefers a bright, creative manicure.
Works on: Medium and long nails, with simplified gradients also suitable for short nails.
Tips for Making Your Valentine’s Manicure Last
A beautiful design is only part of the result. Preparation and aftercare also affect how long your manicure remains presentable.
- Prepare the nail surface: Remove old polish and clean the nails before applying a new color.
- Use thin coats: Thick layers can take longer to dry and may smudge or peel more easily.
- Let each layer dry: Follow the polish manufacturer’s drying instructions before adding intricate artwork.
- Seal the edges: When appropriate for your product, lightly coat the free edge with top coat to help protect the manicure.
- Moisturize regularly: Cuticle oil and hand cream help keep the surrounding skin comfortable and hydrated.
- Avoid picking at polish: Peeling polish can damage the nail’s surface.
- Remove products carefully: Follow the recommended removal method rather than scraping or forcefully peeling the manicure away.
If you use gel polish, follow the product’s curing instructions and use the specified lamp. Avoid skin contact with uncured gel, as it can cause allergic reactions. Stop using a product if irritation develops.
Common Valentine Nail Art Mistakes to Avoid
Even a simple design can become difficult to achieve if the colors, tools, or application method are not suitable.
1. Adding too many details
Hearts, lettering, glitter, and flowers can compete with one another. Choose one main design element and use the others sparingly.
2. Working over wet polish
Drawing on a base that has not dried can cause colors to bleed. Allow enough drying time before adding fine details.
3. Choosing colors with insufficient contrast
White hearts on a pale pink base may be difficult to see. Use a slightly darker shade or a contrasting outline to improve visibility.
4. Ignoring nail length
Detailed lettering and elaborate flowers need room. Simplify the pattern when working with shorter nails rather than trying to fit every detail into a small space.
5. Applying thick coats
Thick layers may smudge, wrinkle, or take longer to dry. Build coverage gradually with thin coats.
6. Using unsuitable products
Not every glitter, powder, or decorative product is designed for direct nail application. Choose products intended for nail use and follow their instructions.
Frequently Asked Questions About Valentine Nails
What are the best nail colors for Valentine’s Day?
Red, pink, burgundy, nude, white, and rose gold are classic options. Chocolate brown, lavender, black, and holographic finishes offer alternatives if you prefer a less traditional look.
Which Valentine’s nail designs work best on short nails?
Classic red hearts, minimalist line art, small polka dots, French tips, and simple accent nails are excellent choices. Smaller patterns help preserve a balanced appearance on shorter nail plates.
Can I create Valentine’s nail art at home?
Yes. Many designs require only ordinary nail polish, a dotting tool, and a fine brush. Start with simple hearts or dots before attempting more intricate patterns such as lace or galaxy swirls.
How can I make my Valentine’s nails look more elegant?
Choose a limited color palette, keep the design consistent, and leave some nails relatively simple. Soft pink ombre, fine line art, rose gold accents, and delicate French tips are good starting points.
Should I choose gel polish or regular nail polish?
Regular polish is convenient for home manicures and can be removed with an appropriate remover. Gel polish generally offers a different finish and wear experience but requires the correct curing system and careful application. Choose the option that suits your needs and follow its instructions.
How far in advance should I do my Valentine’s manicure?
For regular nail polish, allow enough time for the layers and nail art to dry completely before wearing restrictive clothing or handling objects that could smudge the finish. If you want your manicure at its freshest for February 14, consider your chosen product’s expected wear time and your schedule.
How do I choose a Valentine’s nail design that matches my outfit?
For a red or black outfit, try classic red, rose gold, or a nude manicure with small accents. Pastel clothing pairs naturally with soft pink ombre and floral designs. If your outfit already features bold prints or bright colors, minimalist nail art can provide balance.
Final Thoughts: Find Your Perfect Valentine’s Nail Design
Valentine’s nails can be as simple or elaborate as you like. Classic red hearts offer a timeless romantic finish, soft pink ombre creates a delicate look, and holographic or neon designs bring something more playful to the occasion.
When choosing your manicure, consider your preferred colors, nail length, available time, and comfort with nail art. You don’t need to recreate an elaborate design to achieve a beautiful result. A single heart, a clean French tip, or a well-chosen glitter accent can be enough.