Planning a memorable holiday celebration for little ones doesn’t require hours spent over a hot stove or advanced pastry chef credentials.
With just a handful of pantry staples and a big dash of festive imagination, you can whip up snacks that delight toddlers and pre-teens alike.
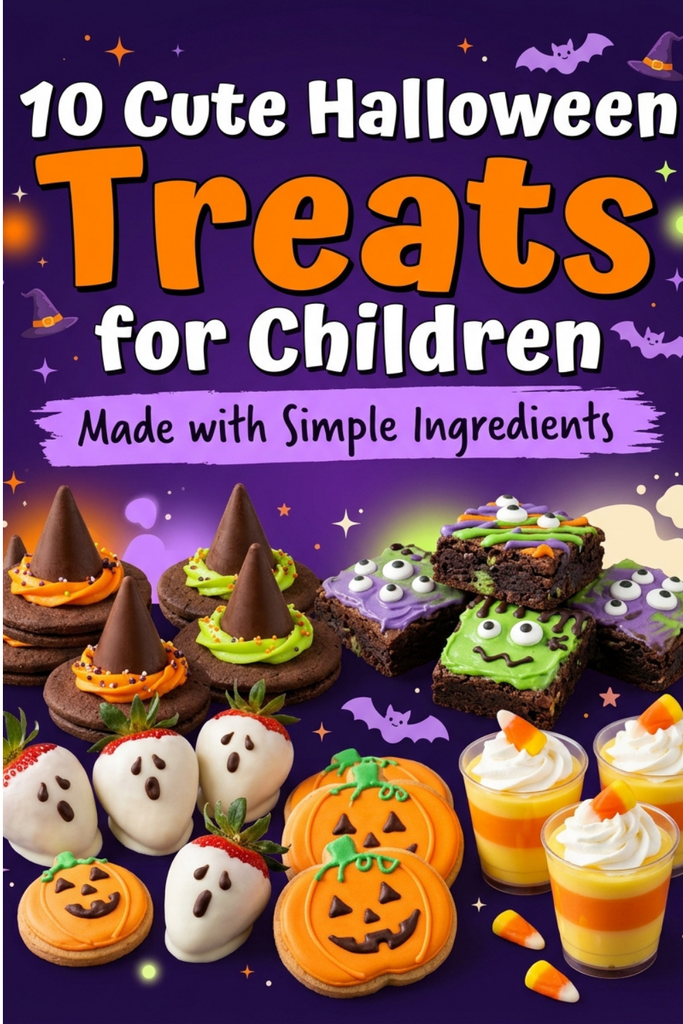
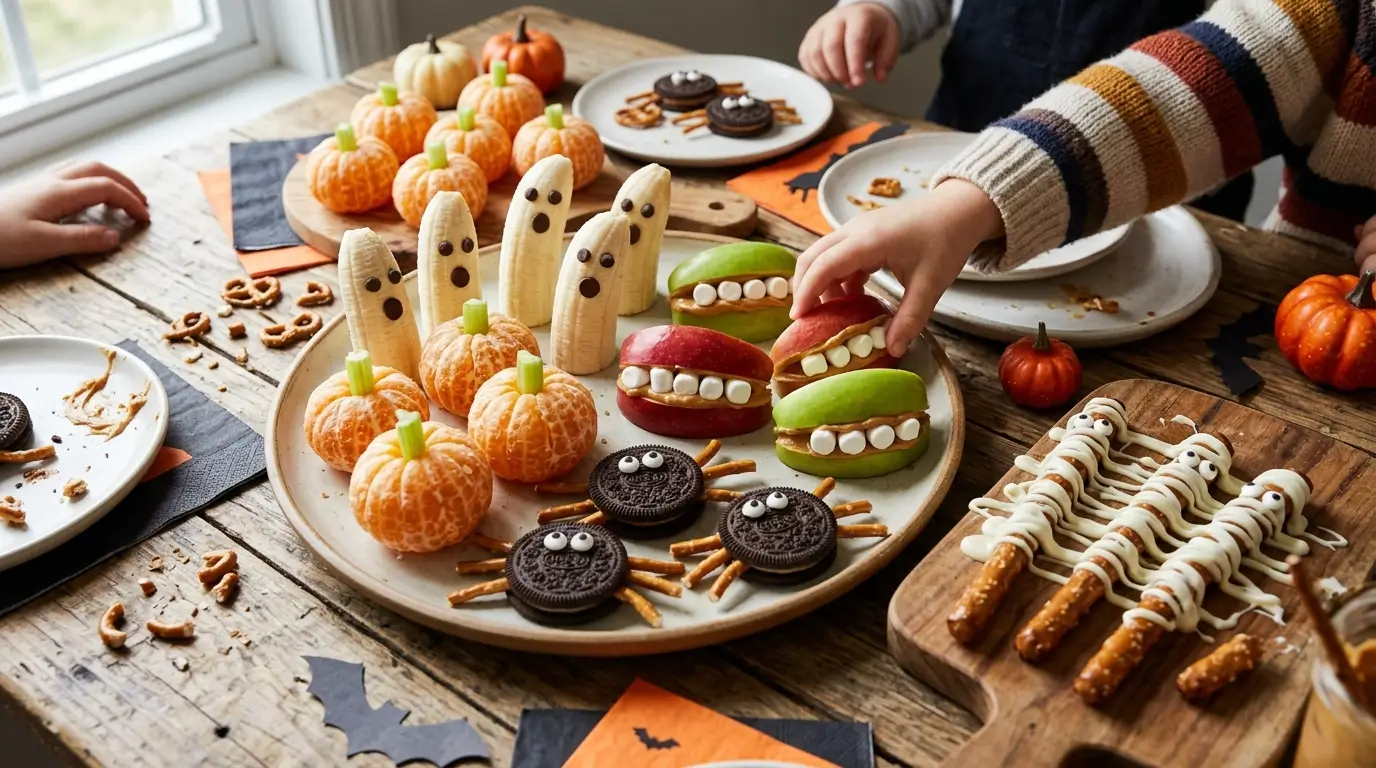
Here are 10 ridiculously cute Halloween treats for children that keep prep time low and smiles high.
10 Halloween Treats for Children:
1. Mummified Banana Pops
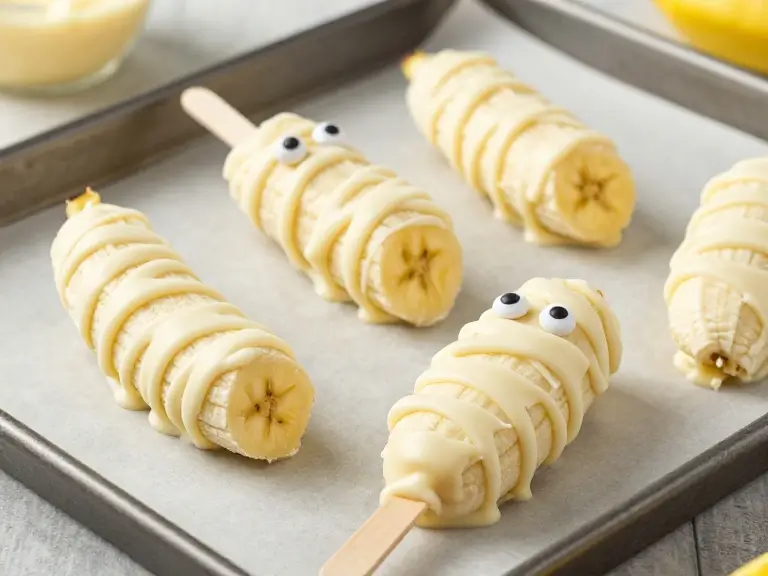
Transforming fruit into spooky characters is an easy way to balance out the sugar rush while keeping things playful. Bananas provide a naturally creamy texture when frozen, making them taste almost like ice cream bars on a stick.
Kids love helping dip and drizzle the melted white chocolate, and adding tiny candy eyes instantly brings these sweet mummies to life for your dessert table.
Steps
- Peel bananas, slice them in half horizontally, and insert a wooden popsicle stick into each cut end.
- Place banana halves on a parchment-lined baking sheet and freeze for 30 minutes until firm.
- Melt white chocolate chips in a microwave-safe bowl in 30-second intervals until completely smooth.
- Dip each frozen banana into melted white chocolate, then drizzle thin lines across to create mummy bandages.
- Press two mini candy eyes near the top before the chocolate sets, then freeze for 15 minutes.
Pro-Tip
- Lightly coat the bananas in lemon juice before freezing to prevent browning if preparing them a day ahead.
🛒 Buy Candy Eyeballs

2. Clementine Pumpkin Patches
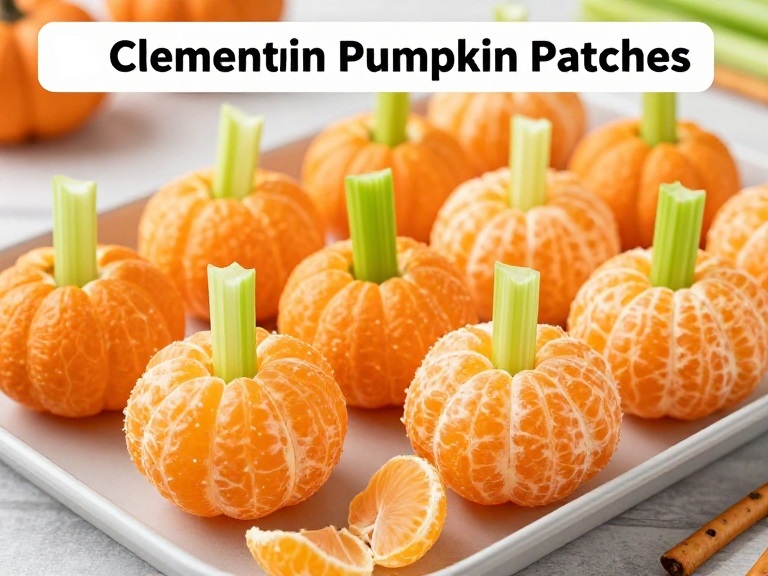
Citrus fruit makes a refreshing alternative to traditional party candy while adding a brilliant pop of orange color to your Halloween spread.
With just two whole food components, this recipe takes less than five minutes to assemble from start to finish. It is ideal for classroom parties where allergies or strict school dietary guidelines are a priority consideration for parents and teachers alike.
Steps
- Peel all clementines completely, leaving the fruit intact without separating individual segments.
- Slice celery stalks into thin, one-inch strips to serve as stems.
- Gently push one celery strip upright into the center opening of each peeled clementine.
- Arrange the finished “pumpkins” together on a flat serving tray to resemble a mini pumpkin patch.
Pro-Tip
- Substitute celery with small pretzel sticks if your children prefer a salty, crunchy contrast with citrus.
🛒 Buy Serving Platter Trays
3. Gooey Monster Rice Cereal Treats
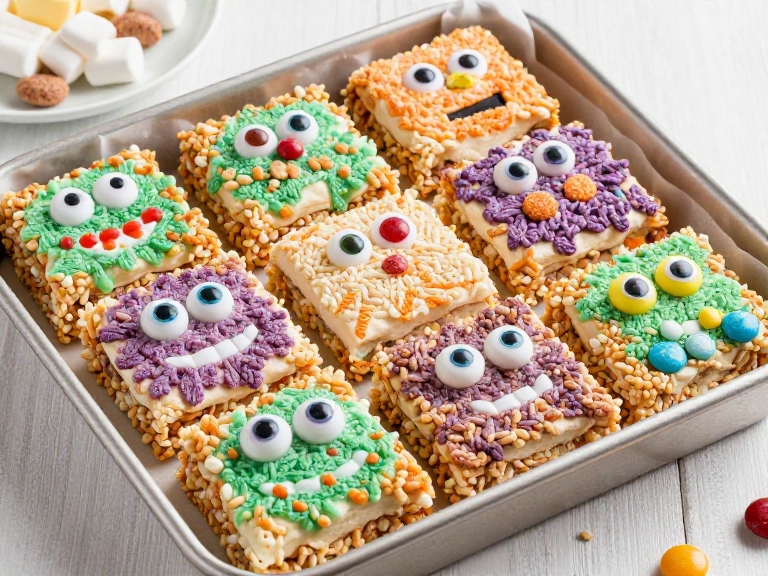
Classic marshmallow squares get a playful monster makeover with vibrant food coloring and a chaotic mix of candy eyeballs.
This no-bake favorite comes together quickly on the stovetop or in the microwave, making it ideal when you need a last-minute party contribution. Kids will have a blast placing the eyes in goofy, asymmetrical patterns all over the warm treats.
Steps
- Melt butter and marshmallows together in a large saucepan over low heat until completely smooth.
- Stir in gel food coloring (green, purple, or orange) until the melted mixture reaches your desired shade.
- Fold in crisp rice cereal until evenly coated, then press gently into a greased 9×13 baking dish.
- Press various sizes of candy eyes onto the top layer while the mixture remains warm and sticky.
- Allow treats to cool completely at room temperature for 20 minutes before cutting into square bars.
Pro-Tip
- Grease your spatula or wax paper with butter or nonstick spray to press the sticky mixture down effortlessly.
🛒 Neon Gel Food Coloring
4. Spooky Pretzel Spider Web Baskets
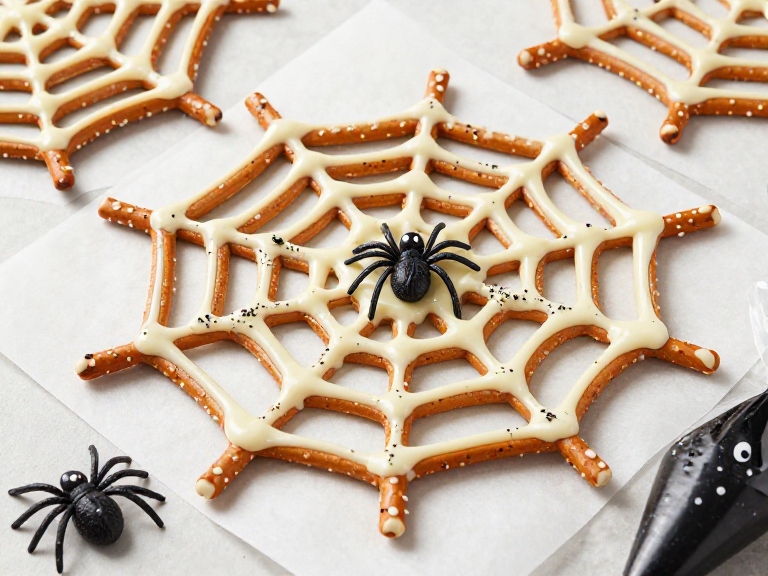
Salty pretzels combined with sweet white chocolate create an additive flavor profile that party guests will devour instantly.
These edible webs look intricate on a dessert table, yet they rely on basic piping techniques that even young beginners can master effortlessly.
They make wonderful cellophane-wrapped favors for school friends or neighborhood trick-or-treaters looking for fun homemade surprises.
Steps
- Arrange pretzel sticks in a starburst pattern on wax paper, overlapping them in the center.
- Melt white chocolate chips or candy melts in a piping bag or ziplock bag with the corner snipped.
- Pipe concentric circles over the pretzel framework, starting from the center and spiraling outward.
- Place a tiny plastic spider ring or candy spider in the center before the chocolate hardens completely.
- Chill in the refrigerator for 10 minutes until the webs are firm enough to peel off easily.
Pro-Tip
- Dust a sprinkle of edible black glitter over the warm chocolate webs for an extra magical shimmer.
🛒 : White Candy Melts
5. Peanut Butter Apple Monsters
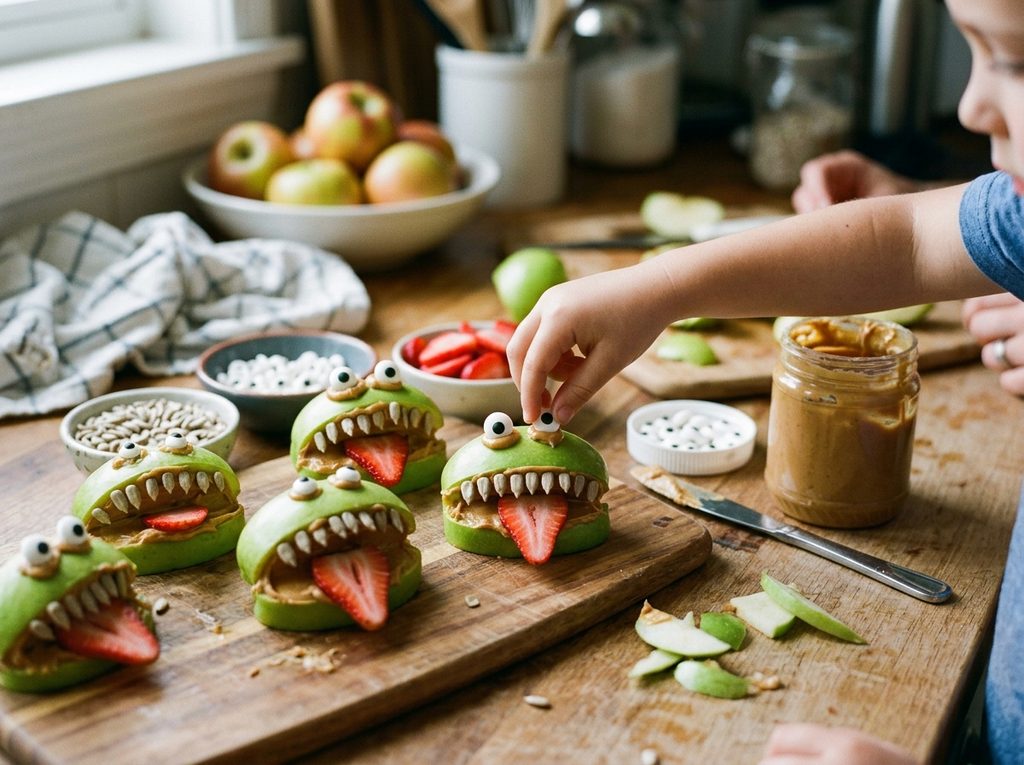
Fruit slices smeared with nut butter create a hearty, wholesome afternoon snack disguised as silly monsters. Strawberries serve as dangling tongues, while sunflower seeds emulate sharp, mismatched teeth sticking out from green apple jaws.
This project encourages creative play in the kitchen, allowing children to build unique facial expressions on every single piece before eating.
Steps
- Core apples and cut them into thick quarter slices, then cut a wedge out of each slice’s skin side.
- Coat the inside of the carved apple mouth liberally with creamy peanut butter or sunflower seed butter.
- Press raw sunflower seeds into the top edge of the mouth opening to create pointy monster teeth.
- Insert a thinly sliced strawberry oval into the bottom fold to represent a long, popping tongue.
- Attach candy eyes above the mouth using a small dab of peanut butter as edible glue.
Pro-Tip
- Soak sliced apples in salt water for 5 minutes and rinse to keep them crisp and non-browned all day.
🛒: Sunflower Seed Butter
6. Mini Ghost Donut Towers
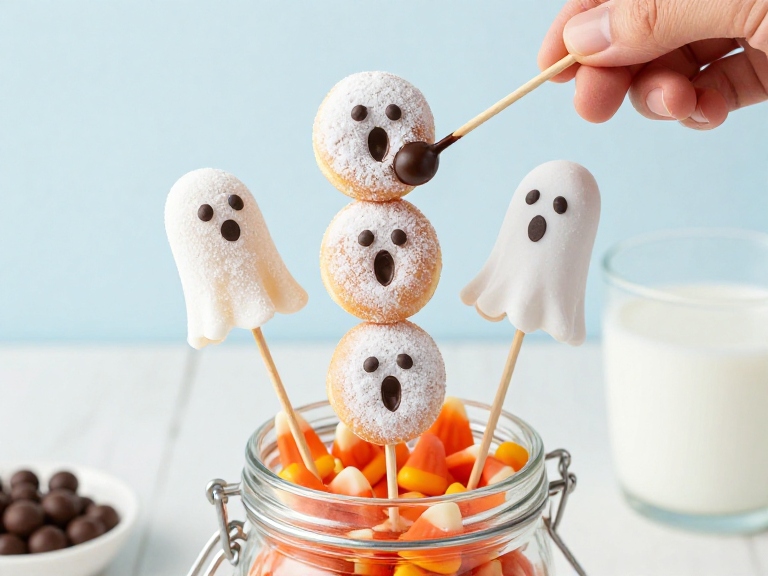
When time is short and morning celebrations loom near, powdered mini donuts provide an instant shortcut to adorable ghost treats.
Stacking them on skewers creates an impression of floating spirits ready to haunt the breakfast table.
This low-mess idea requires zero cooking, making it a stress-free option for busy parents managing early-morning party preparation demands.
Steps
- Slide three mini powdered donuts onto a wooden lollipop stick or bamboo skewer, stacking them vertically.
- Melt a small batch of dark chocolate chips or milk chocolate chips in the microwave.
- Dip a toothpick into the melted dark chocolate to paint eyes and an open mouth onto the top donut.
- Repeat the face-painting process for the lower donuts or leave them plain as ghost bodies.
- Stand the skewers upright in a decorative jar filled with orange candy corn for stable presentation.
Pro-Tip
- Use black edible marker pens instead of melted chocolate for an even faster, mess-free decorating process.
🛒 Edible Food Markers
7. Chocolate Bat Sandwich Cookies
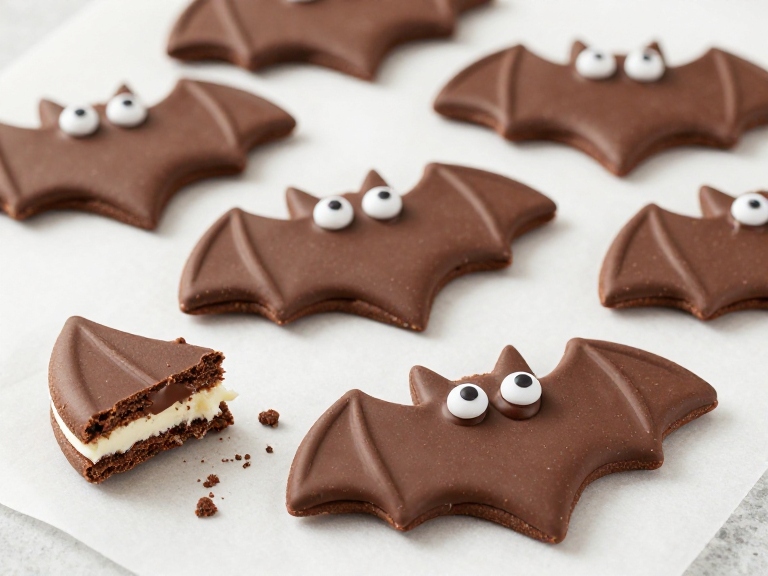
Store-bought chocolate sandwich cookies form the foundation of these crunchy, wing-ed creatures that require zero baking expertise.
With broken sandwich cookie halves acting as bat wings, this assembly-only treat comes together in minutes.
It is an ideal snack for large gatherings or classroom events where quick production and familiar, beloved flavors are essential success factors.
Steps
- Twist open half of your cookie supply, scrape off the white cream filling, and snap cookies in half.
- Dab melted chocolate onto the top of intact sandwich cookies to act as adhesive glue for wings.
- Press two cookie halves onto each intact cookie at an angle, creating raised bat wing shapes.
- Attach two mini candy eyes to the front face of each bat using melted chocolate dabs.
- Let the assembled cookies sit undisturbed on wax paper for 10 minutes until secure and firm.
Pro-Tip
- Use mint-filled or peanut butter sandwich cookies to offer guests fun, unexpected flavor variations inside.
🛒 Chocolate Sandwich Cookies
8. Frankenstein Marshmallow Pops
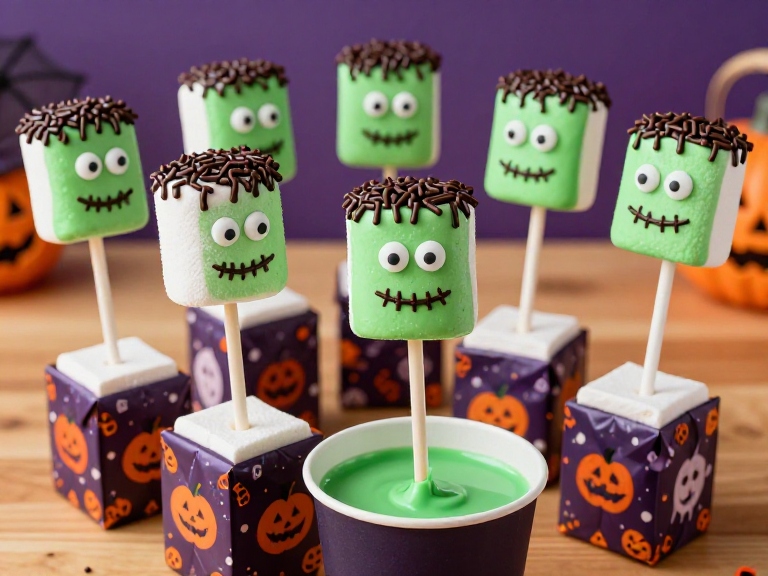
Large marshmallows transformed into green monsters offer a chewable treat that looks straight out of an animated film.
Dipping them in melted green coating and adding chocolate sprinkle hair gives each pop an instantly recognizable Frankenstein silhouette.
They make excellent centerpiece decorations when arranged upright in foam blocks wrapped in festive, Halloween-themed tissue paper.
Steps
- Insert a lollipop stick securely into the bottom base of each large regular marshmallow.
- Melt green candy wafers in a deep, heat-safe cup according to package microwave instructions.
- Dip each marshmallow into the green coating until fully covered, tapping gently to remove excess liquid.
- Dip the top portion directly into chocolate sprinkles before the green coating sets to form hair.
- Add candy eyes and draw a stitched mouth using a toothpick dipped in melted dark chocolate.
Pro-Tip
- Chill marshmallows in the freezer for 10 minutes before dipping so the warm candy coating sets faster.
🛒 Shop Ingredients: Buy Paper Treat Sticks on Amazon
9. Witch Broom Pretzel Sticks
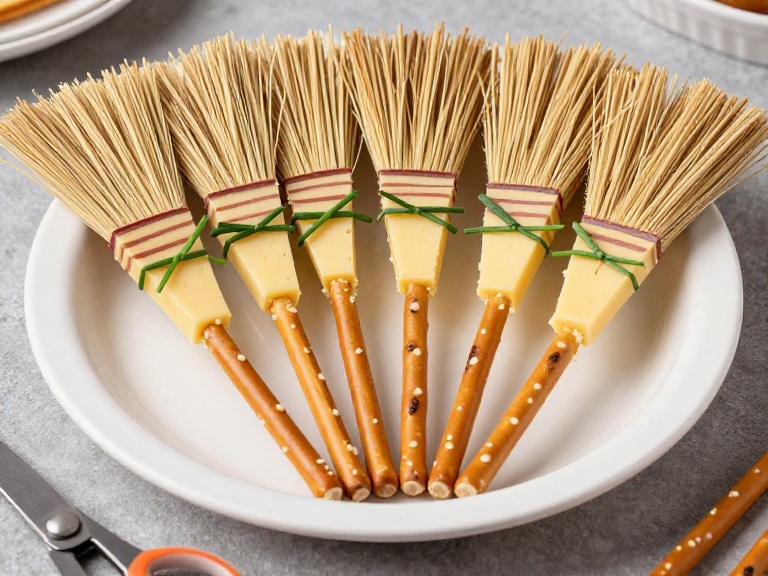
Combining salty pretzel rods with string cheese creates a savory snack that breaks up the sweet party sugar overload.
These miniature broomsticks look magical stacked on trays and take only moments to assemble using simple kitchen shears. Kids love shredding the cheese bottoms to make realistic broom bristles that stand up on party plates.
Steps
- Cut string cheese sticks horizontally into three equal shorter segments using a clean knife.
- Make vertical cuts halfway up each cheese segment using kitchen shears to form broom bristles.
- Push a small pretzel stick down into the uncut top half of each cheese segment firmly.
- Tie a fresh chive strip around the top cheese band to complete the rustic broomstick look.
- Arrange vertically on a serving dish or lay them flat in a circle on party platters.
Pro-Tip
- Keep string cheese cold until assembly so it maintains structural firmness when inserting pretzel handles.
🛒 Pretzel Sticks
10. Graveyard Pudding Cups
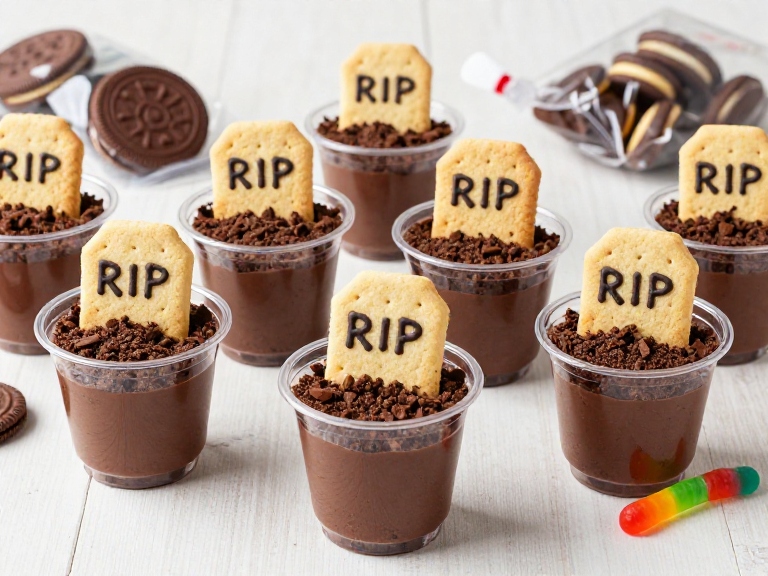
Individual chocolate pudding cups topped with crushed cookies create an edible dirt foundation that children find irresistible.
Inserting a decorated biscuit cookie turns each cup into an spooky tombstone rising from the ground.
This classic party treat is simple to customize with candy worms or pumpkin candies, making it a hit for Halloween film nights.
Steps
- Spoon prepared chocolate pudding into clear plastic cups or use pre-packaged individual snack cups.
- Crush chocolate graham crackers or chocolate sandwich cookies inside a sealed bag using a rolling pin.
- Layer crushed cookie crumbs generously over the top of the pudding to emulate freshly dug dirt.
- Write “RIP” on rectangular butter biscuits using edible black gel or melted dark chocolate.
- Insert one tombstone biscuit halfway into each cup, placing a gummy worm alongside the base.
Pro-Tip
- Use clear plastic cups so guests can see the layered “soil” effect from the side before digging in.
🛒 Gummy Worms
Final Thoughts
Creating festive Halloween treats for children doesn’t require complex baking skills or endless hours in the kitchen.
By reimagining everyday pantry items like fruits, cookies, and marshmallows with creative touches, you can bring spooky magic to your holiday table effortlessly.
Try mixing sweet and savory options to keep things balanced, and involve the kids in the decorating process for memorable family fun.
Frequently Asked Questions
What are the best healthy options for Halloween treats for children?
Fruit-based ideas like clementine pumpkins, banana mummies, and peanut butter apple monsters are fantastic options. They deliver festive charm using real fruit, offering a natural sweetness that balances traditional holiday candies.
How far in advance can I make these Halloween snacks?
Dry snacks like chocolate bat cookies and pretzel webs can be prepared 1 to 2 days ahead if stored in airtight containers. Fruit-based snacks like apple monsters or banana pops are best prepared the day of the event to preserve freshness and texture.
How do I handle food allergies for school party treats?
Stick to whole-food options like clementine pumpkins or substitute peanut butter with sunflower seed butter in recipes. Always check labels on candy eyes, chocolates, and cookies to ensure they are manufactured in nut-free facilities.